The problem
You designed a beautiful certificate in Canva. Now you need to generate 500 personalized versions for your course graduates, training participants, or event attendees.
Canva can't do this automatically. You'd have to manually edit each certificate, change the name, download, and repeat. That's hours of tedious work.
The solution: Export your Canva design once, import it into TemplateFox, add dynamic fields, and automate the rest. Your design stays exactly the same — only the personalized data changes.
Find or create a certificate on Canva
We're not going to design a certificate from scratch for this tutorial 🙂 Already have one? Jump to step 1.3.
1.1 — Find a template
Let's grab a template and customize it:
- Go to canva.com and sign up (or log in)
- In the search bar, type "certificate"
- Browse the templates and select one you like

1.2 — Customize the template
Click "Customize this template" to open it in the Canva editor. Add your branding — logo, colors, fonts.

1.3 — Remove dynamic text
Delete any text that will change per certificate (recipient name, date, etc.). We'll add these as dynamic fields in TemplateFox.
In my case, for simplicity, I'll just remove the student's first and last name.
- Select the recipient name text
- Delete it completely

Tip: Keep your design elements (borders, decorations) — just clear the text that will change per certificate.
1.4 — Export as PNG
Export your certificate as an image:
- Click Share → Download
- Choose PNG format
- Click Download
Why PNG? Simpler to work with — no font embedding issues. Your design becomes a background image.
Import and configure on TemplateFox
2.1 — Import the design
Create a new template and import your Canva design:
- Go to Templates in your dashboard
- Click Create Template
- Choose Fixed (single-page documents)
- Change dimension to A4 Landscape
- Set zoom to 75% to see the full page
- Extend the initial section to fill the entire page
- Click New Element → Image
- Upload your PNG and extend it to cover the whole background — it should fit perfectly
2.2 — Add dynamic fields
Add text fields that will be populated from Zapier. For this demo, we'll only add a {{name}} field:
- Add a Text element
- Type
{{name}} - Position it where the recipient name should appear
- Set the font to Great Vibes at size 90 for an elegant signature look
- Center the text horizontally and align it to the bottom of the text box
- Adjust line spacing so the text sits properly at the bottom (for Great Vibes, 0.8 works well)
- Enable Autoscale Down so long names automatically shrink to fit
Common dynamic fields you can use:
{{recipient_name}}— Student/recipient name{{course_title}}— Course or program name{{completion_date}}— Date of completion{{certificate_id}}— Unique certificate number
Tip: Click the Preview tab and add test data in the JSON panel. Test with both short and long names to verify autoscale works correctly — try {"name": "Jo"} and {"name": "Christopher Montgomery-Williams"} to make sure the text scales properly in both cases.
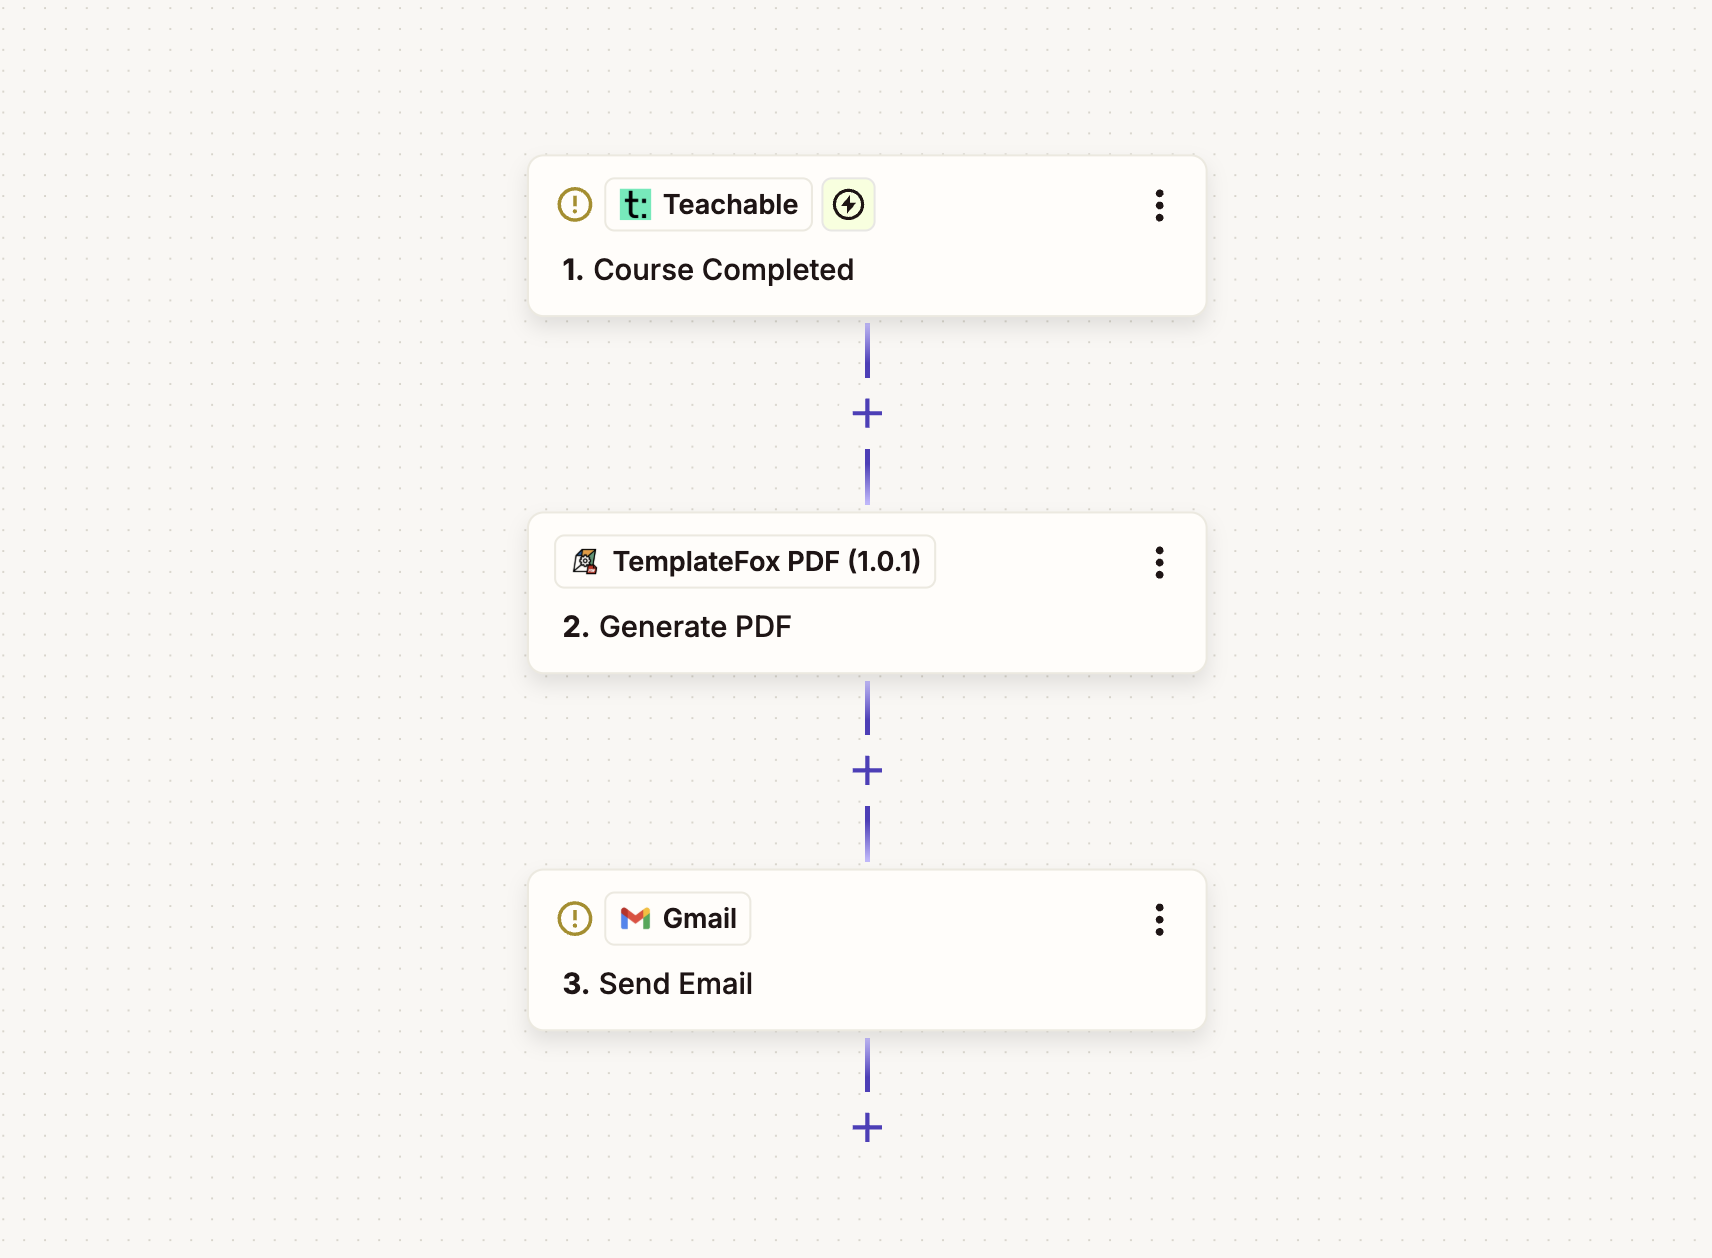
Connect with Zapier
Create a Zap to connect your data source to TemplateFox:
- Go to zapier.com and create a new Zap
- Trigger: Choose your data source:
- Course platform (Teachable, Thinkific, Kajabi) → select "Course Completed"
- Google Sheets → select "New Row"
- Typeform → select "New Entry"
- Action: Search for "TemplateFox"
- Select "Generate PDF"
- Connect your TemplateFox account with your API key
- Map the fields: select your student name field and map it to
name - Add another action: Gmail, Outlook, or SMTP
- Use the student's email from the trigger
- Attach the PDF URL from the TemplateFox action
- Turn on your Zap — you're done!
New to Zapier? Learn more about our Zapier PDF integration — native integration, 7,000+ app connections, no code required.
Who uses this
- Online course creators — Teachable, Thinkific, Kajabi, Udemy instructors
- Corporate training teams — Compliance certifications, skill assessments
- Event organizers — Conference attendance, webinar participation
- HR departments — Employee recognition, years of service awards
