The problem
Every time you receive a payment, you need to send an invoice. Manually creating each invoice means copying customer details, adding line items, calculating totals, exporting to PDF, and emailing it. For 10 orders a day, that's hours of repetitive work.
Payment platforms like Stripe have built-in invoicing, but the designs are generic and don't match your brand. You want professional, branded invoices without the manual work.
The solution: Create a branded invoice template once in TemplateFox, connect it to your payment platform via Zapier, and let it auto-generate and email invoices for every sale.
Create your invoice template
1.1 — Choose a template
Start with one of our pre-built invoice templates or create your own:
- Go to Templates
- Filter by Invoice category
- Choose a template that matches your style (minimal, corporate, creative)
- Click Use Template to add it to your dashboard
Recommended templates: EU VAT Corporate for European businesses, Freelancer for consultants.
1.2 — Understand the template structure
The template uses dynamic fields that get replaced with real data. Some fields you'll hardcode (your company info), others come from Zapier (client, invoice details).
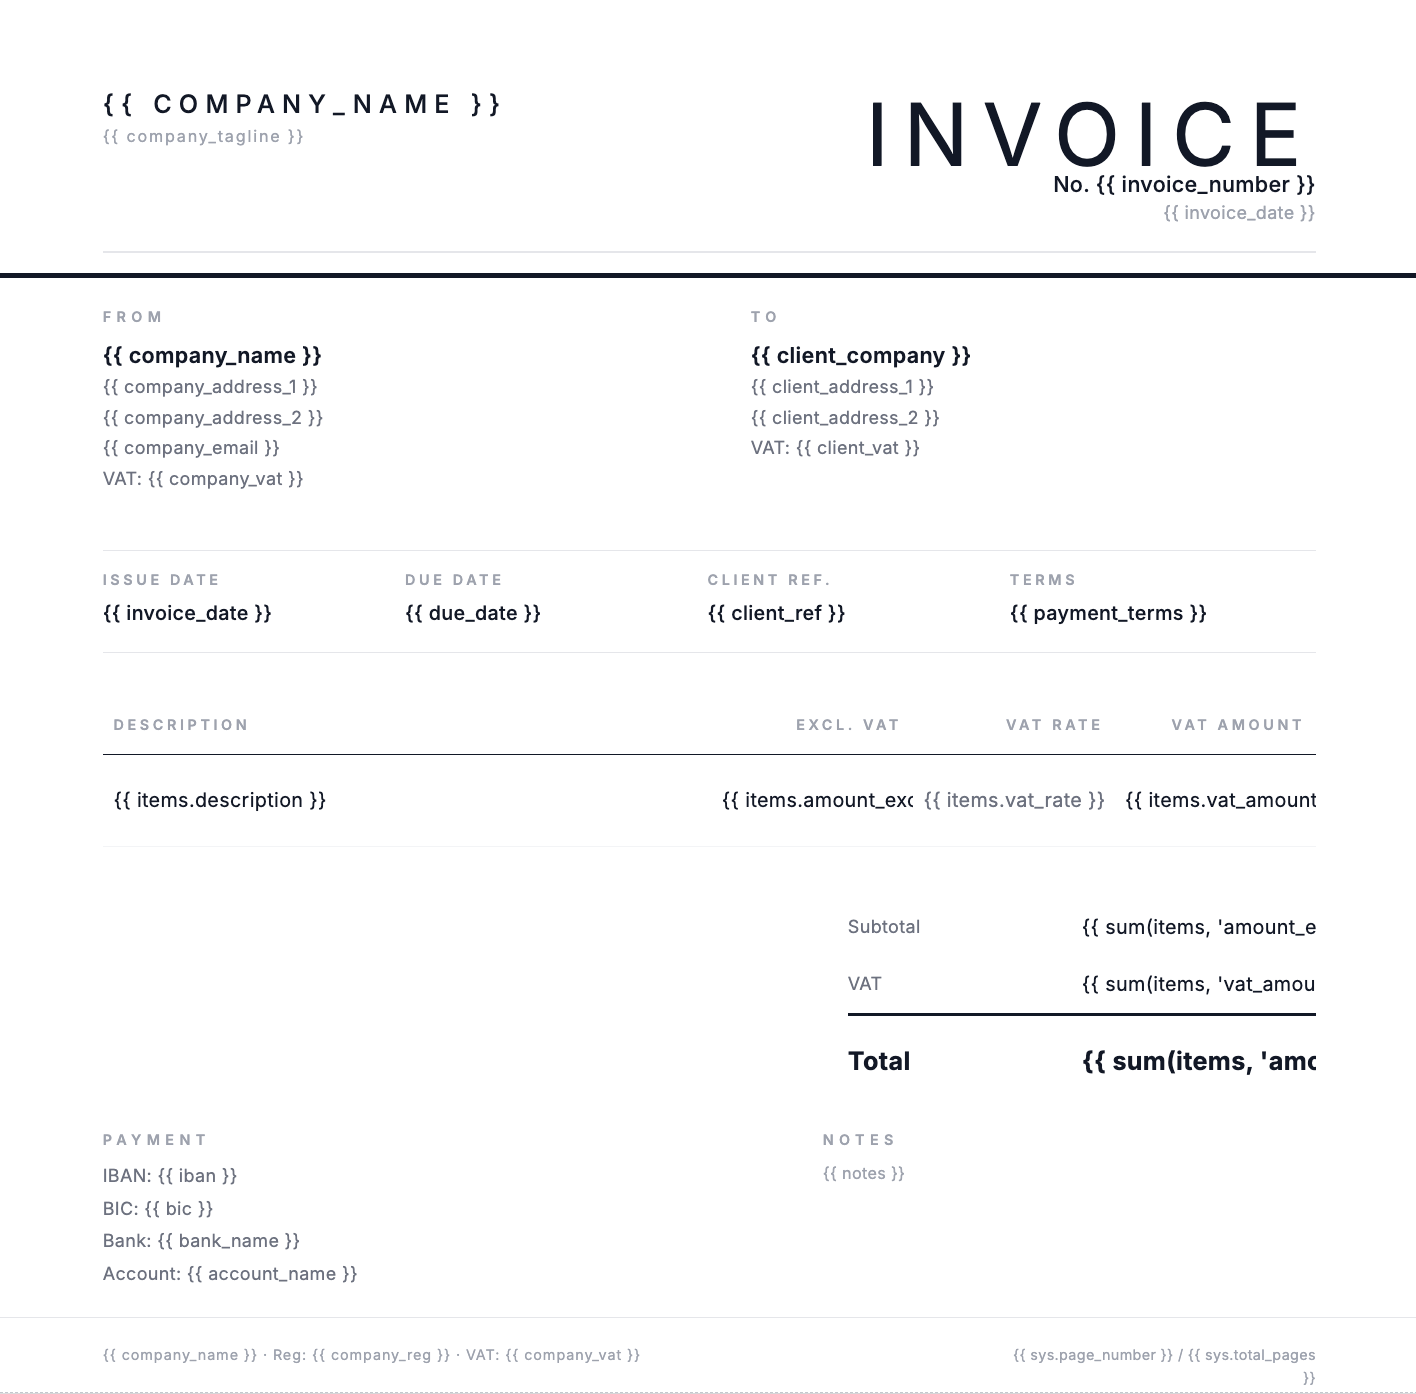
Hardcode once (your company)
company_name— Your business namecompany_address_1/2— Your addresscompany_vat— Your VAT numberiban,bic,bank_name— Bank details
Edit these directly in the template — they stay the same for every invoice.
Dynamic from Zapier (per invoice)
client_company— Customer nameclient_address_1/2— Customer addressinvoice_number— Unique invoice IDinvoice_date,due_date— Datesitems[]— Line items array
Map these from your payment platform in Zapier.
Auto-expanding line items table
The items table automatically repeats for each product in the items array. Send 2 items, get 2 rows. Send 10 items, get 10 rows.
Automatic totals with expressions
The template calculates subtotal, VAT, and total automatically using sum() expressions. You don't need to calculate these in Zapier.
Page numbers (for multi-page invoices)
The footer shows page numbers using system variables. If your invoice has many line items and spans multiple pages, pagination is automatic.
Learn more: Expressions · System variables · Tables
1.3 — Test with the Preview tab
The Preview tab lets you test your template with sample data before connecting to Zapier. The JSON panel on the right contains your test data, and the rendered invoice appears on the left in real-time.
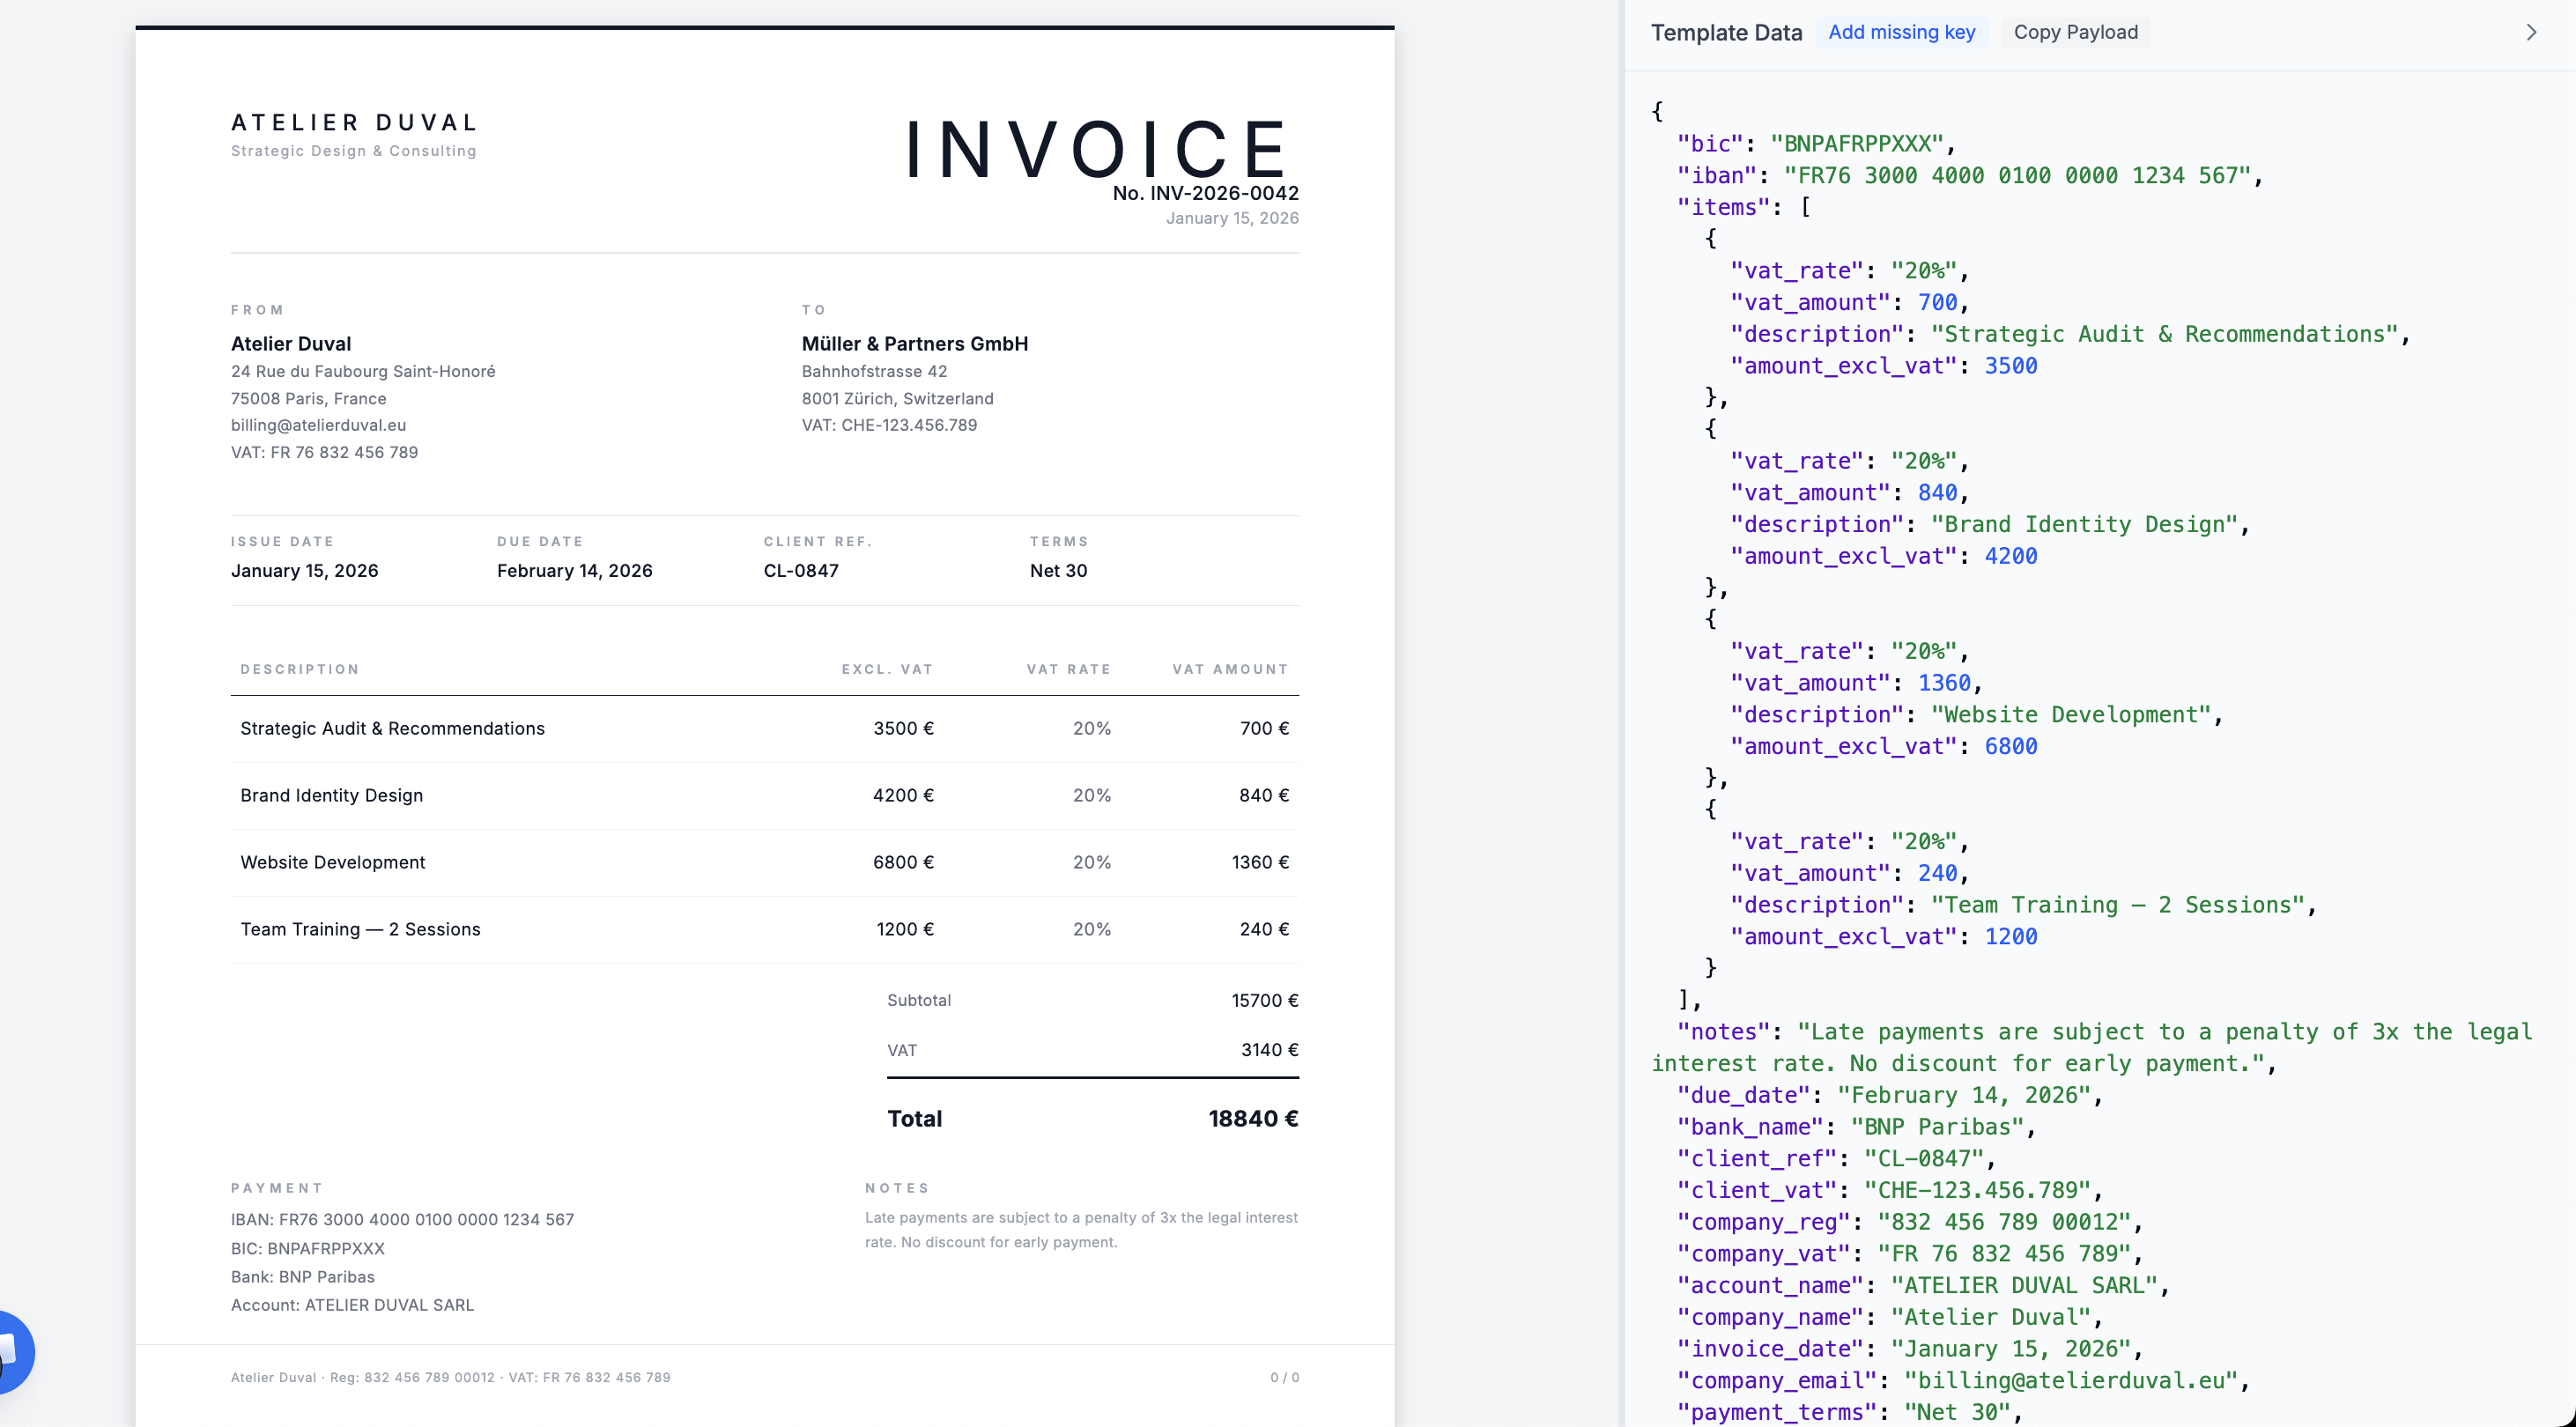
JSON data maps to template fields
Each key in the JSON (like client_company) fills its matching {{client_company}} placeholder.
Line items array becomes table rows
The 4 objects in the items array generate 4 table rows automatically.
Totals calculate automatically
The sum() expressions add up all values: 3500 + 4200 + 6800 + 1200 = 15700 € subtotal.
Tip: Use the Copy Payload button to copy the JSON structure. This is the exact format you'll need to send from Zapier.
View full JSON payload example
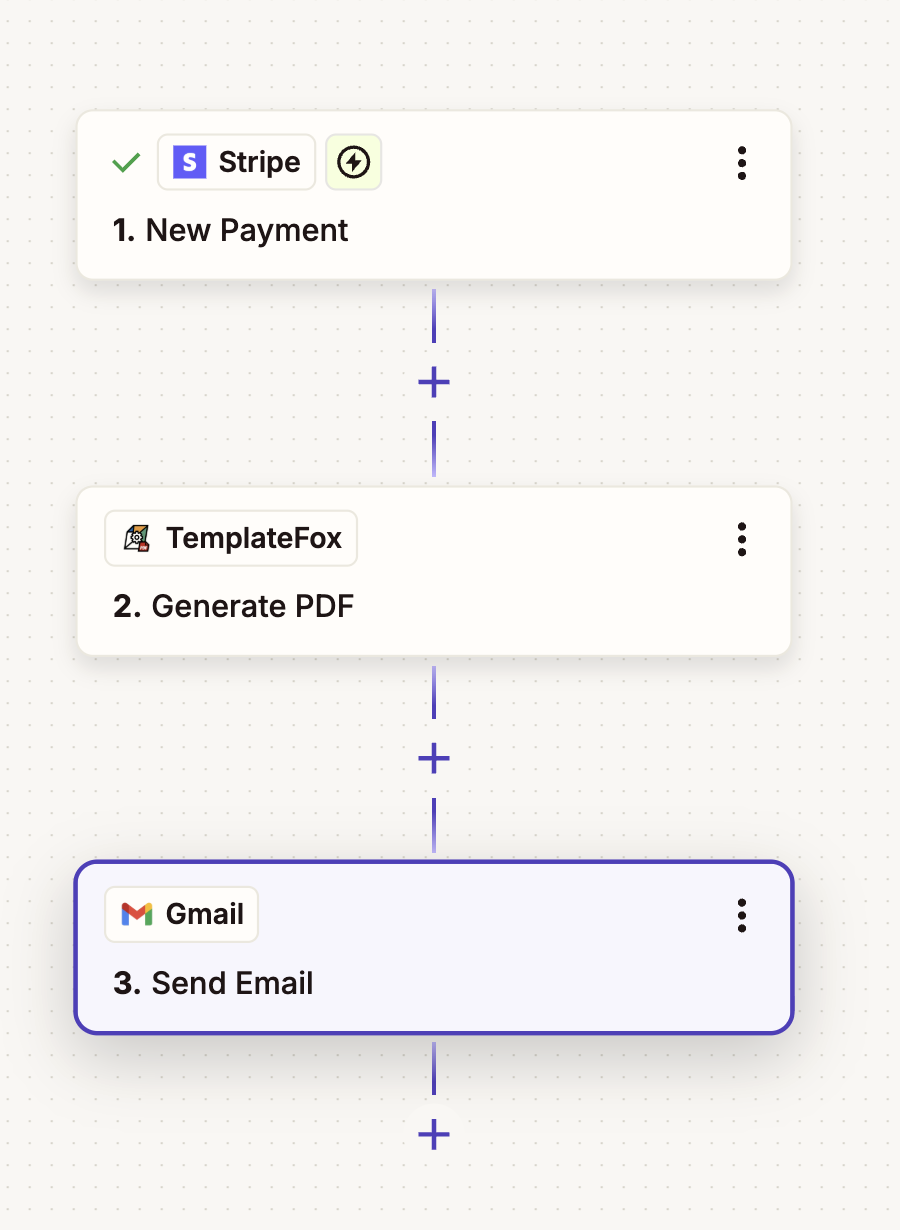
Connect with Zapier
Here's the complete workflow — 3 steps that run automatically on every payment:
2.1 — Set up the trigger
Choose your payment platform and trigger event:
Stripe
Trigger: New Payment Intent Succeeded or New Charge
Gumroad
Trigger: New Sale
LemonSqueezy
Trigger: New Order
Paddle
Trigger: New Payment Completed
- Go to zapier.com and create a new Zap
- Search for your payment platform
- Select the appropriate trigger event
- Connect your account and test the trigger
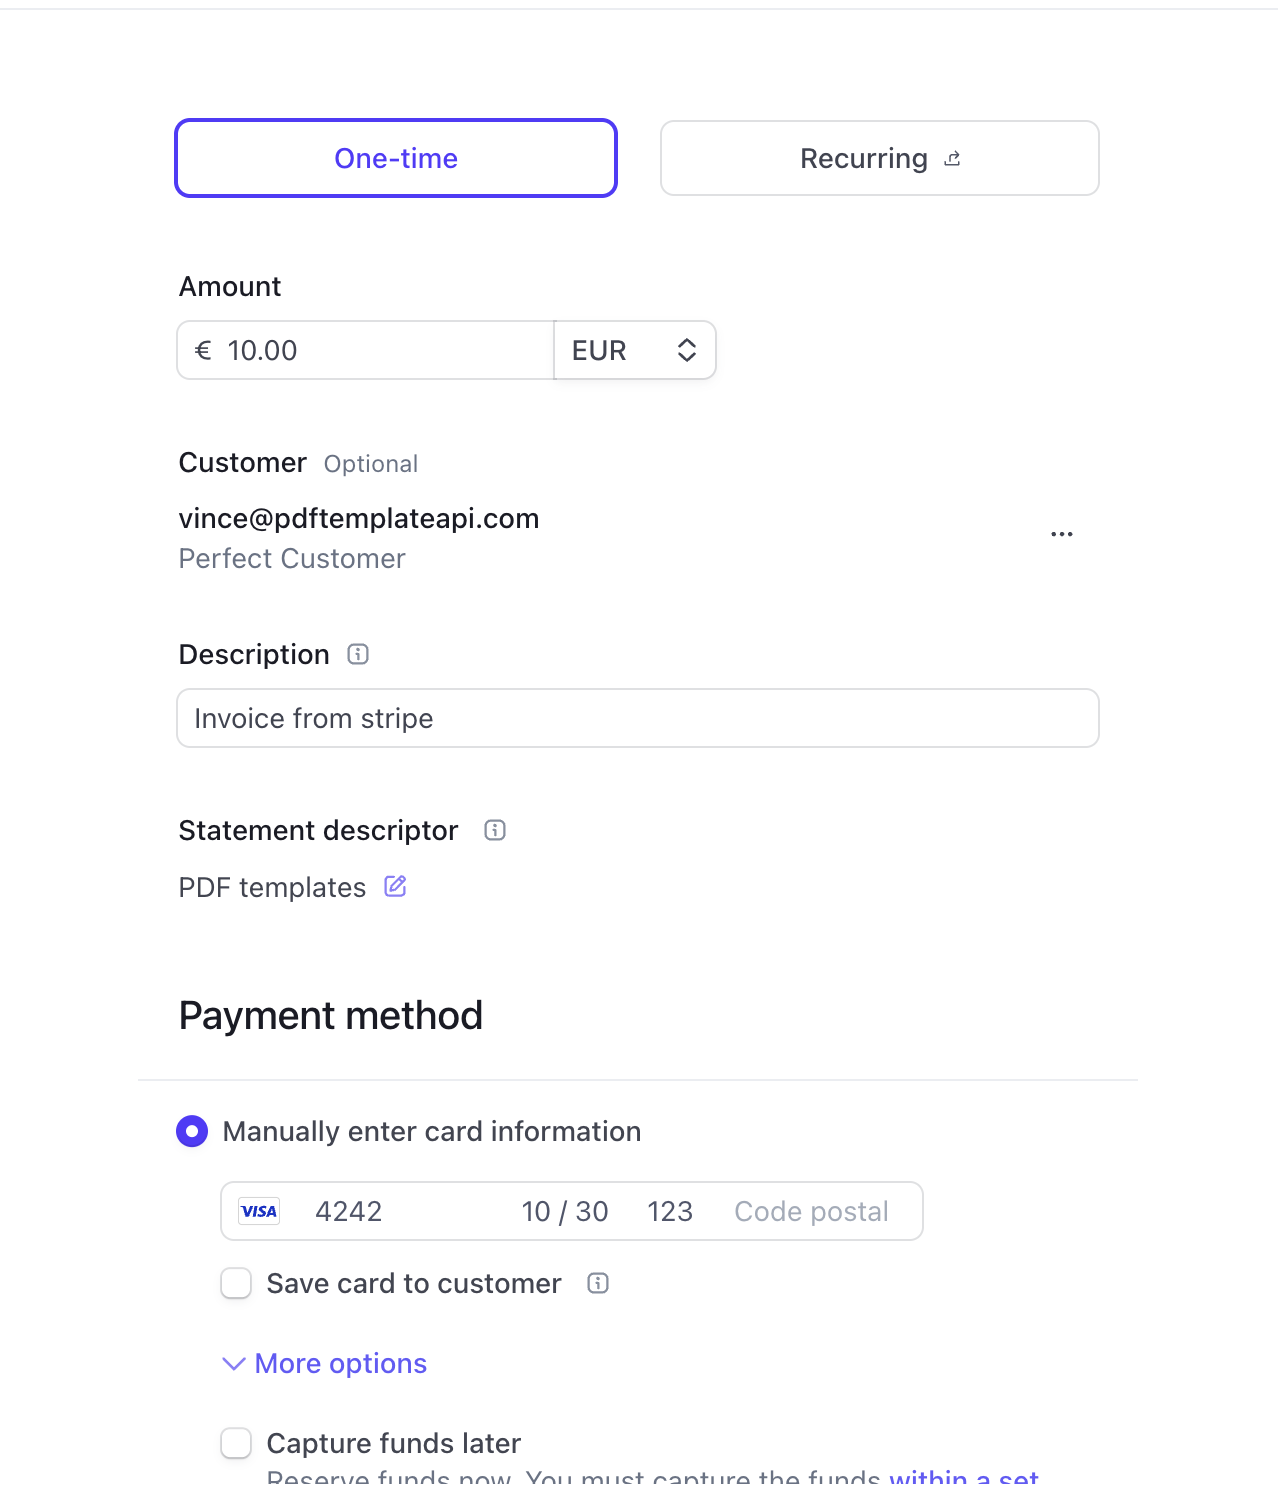
🧪 Testing with Stripe Test Mode
Connect Zapier using your test secret key (starts with sk_test_). Then create a test payment in Stripe Dashboard:
- • Card:
4242 4242 4242 4242 - • Expiry: any future date (e.g.,
10/30) - • CVC:
123
2.2 — Add TemplateFox action
After testing the trigger, Zapier has your Stripe data. Now connect it to your invoice template:
- Add an Action step
- Search for "TemplateFox"
- Select "Generate PDF"
- Connect your TemplateFox account with your API key
- Select your invoice template
- Map each field — click the + button to insert Stripe data, or type static text
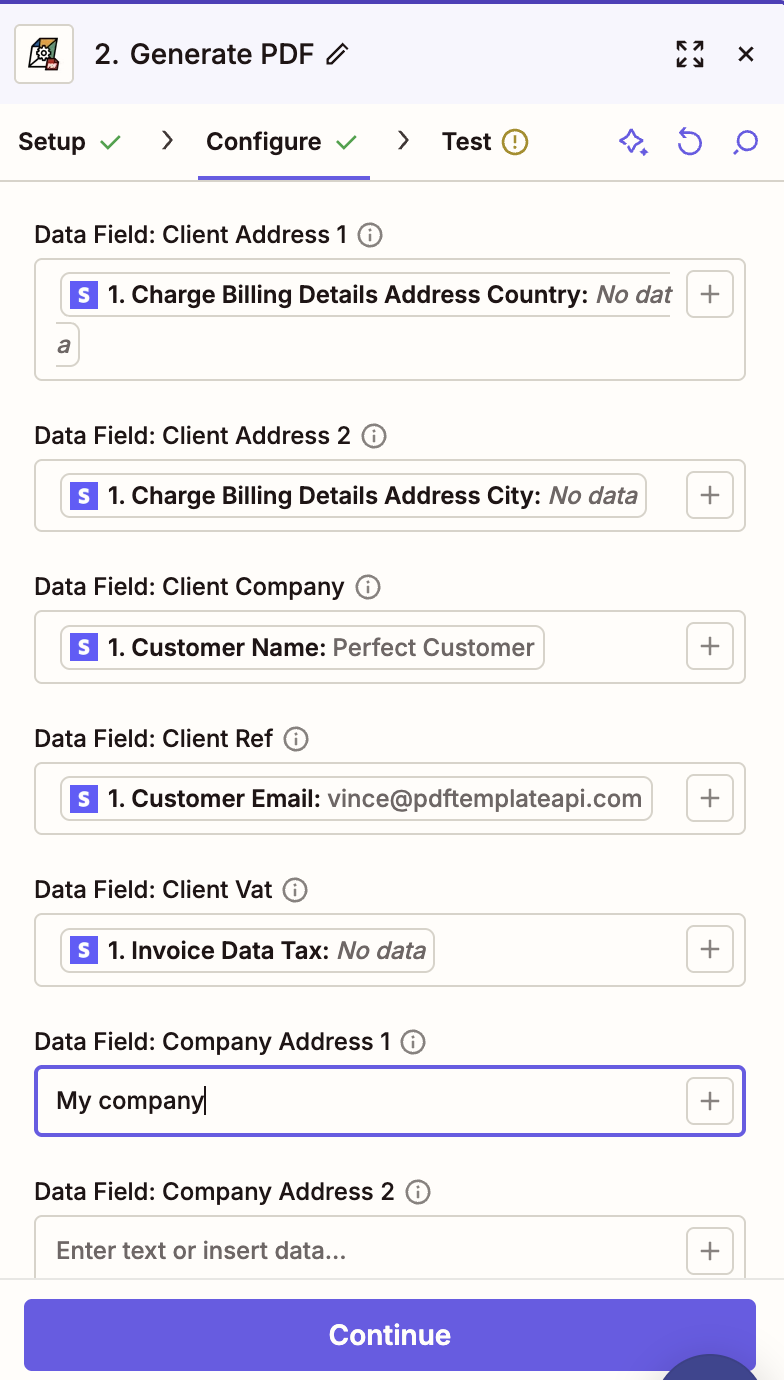
Tip: Hardcode your company info (address, IBAN, VAT) directly in the fields — they stay the same for every invoice. Only map dynamic data like customer name and amounts from Stripe.
2.3 — Send via email
Automatically email the invoice to your customer:
- Add another Action step
- Choose Gmail, Outlook, or SMTP by Zapier
- Select "Send Email"
- Set the recipient to the customer's email from the trigger
- Write your email subject:
Invoice #{{invoice_number}} from Your Company - Attach the PDF URL from the TemplateFox action
- Turn on your Zap
Done! Every time a payment is received, your customer automatically gets a branded PDF invoice.
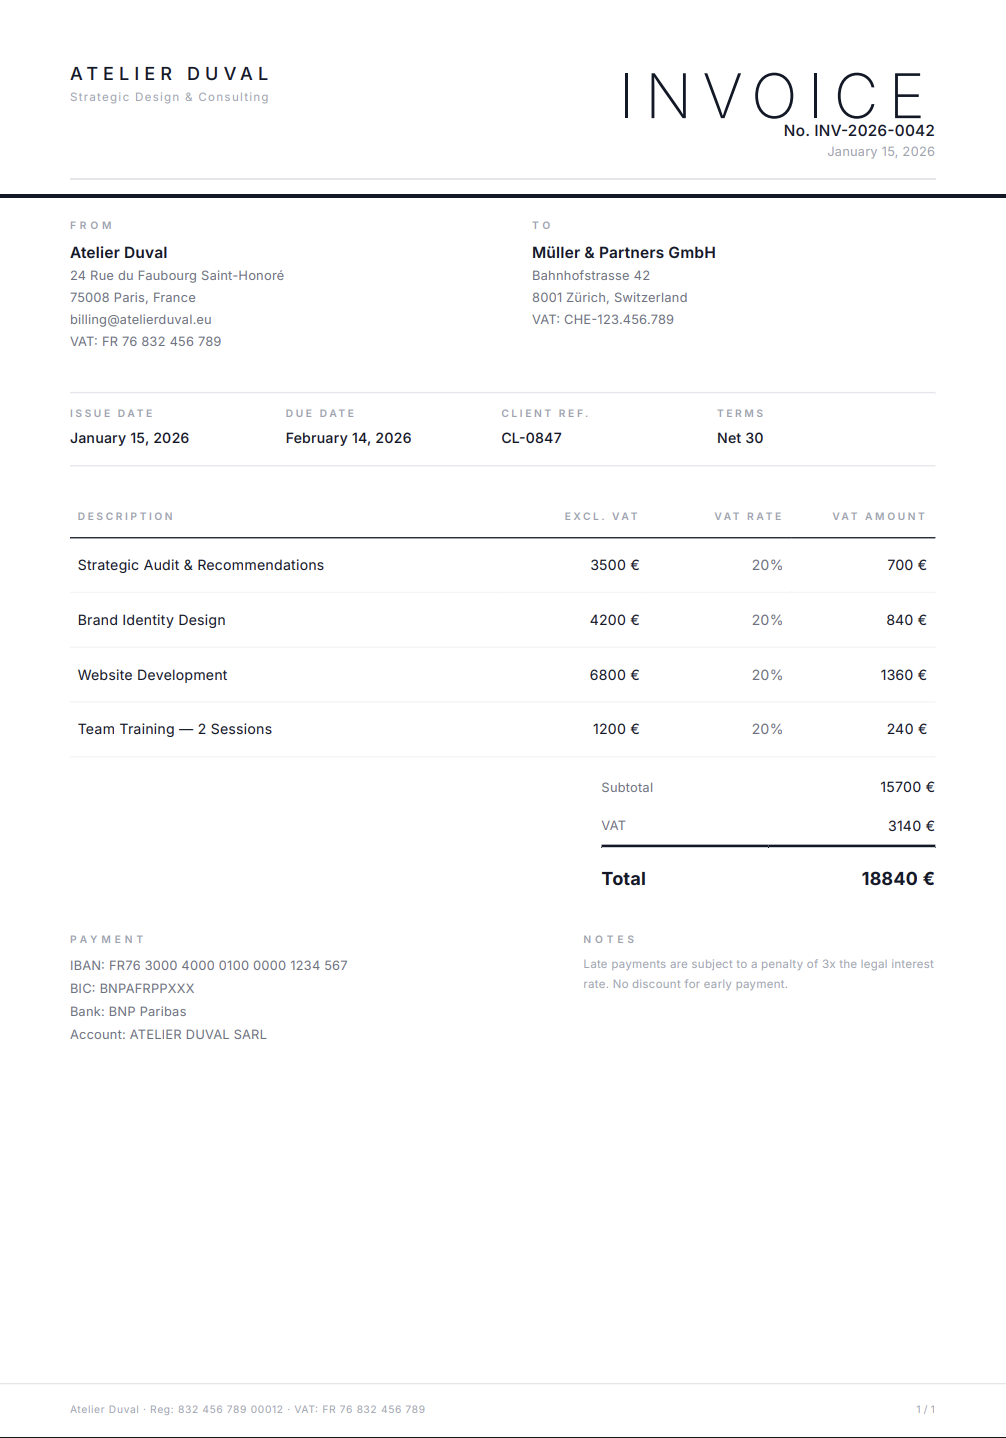
The result
Here's what your customer receives — a professional, branded invoice generated automatically from Stripe payment data:
Supported platforms
Any payment platform with a Zapier integration works. Here are the most popular:
