The problem
Every time you receive an order, you need to create a shipping label. Manually entering the customer's address, selecting the carrier, adding the tracking number, and printing the label. For 50+ orders a day, that's hours of repetitive work and plenty of room for errors.
Built-in shipping label generators from Shopify or ShipStation work, but they're generic. You can't add your branding, custom fields, or the exact layout your warehouse needs.
The solution: Create a branded shipping label template once in TemplateFox, connect it to your e-commerce platform via Zapier, and let it auto-generate labels for every order.
Create your shipping label template
1.1 — Choose a template
Start with one of our pre-built shipping label templates or create your own:
- Go to Templates
- Filter by Shipping Label category
- Choose the format that matches your printer (A4 or US Letter)
- Click Use Template to add it to your dashboard
Recommended templates: A4 with Barcode for standard printers, US Letter for North American formats.
1.2 — Understand the template structure
The template uses dynamic fields that get replaced with real data. Some fields you'll hardcode (your return address), others come from Zapier (recipient address, tracking number).
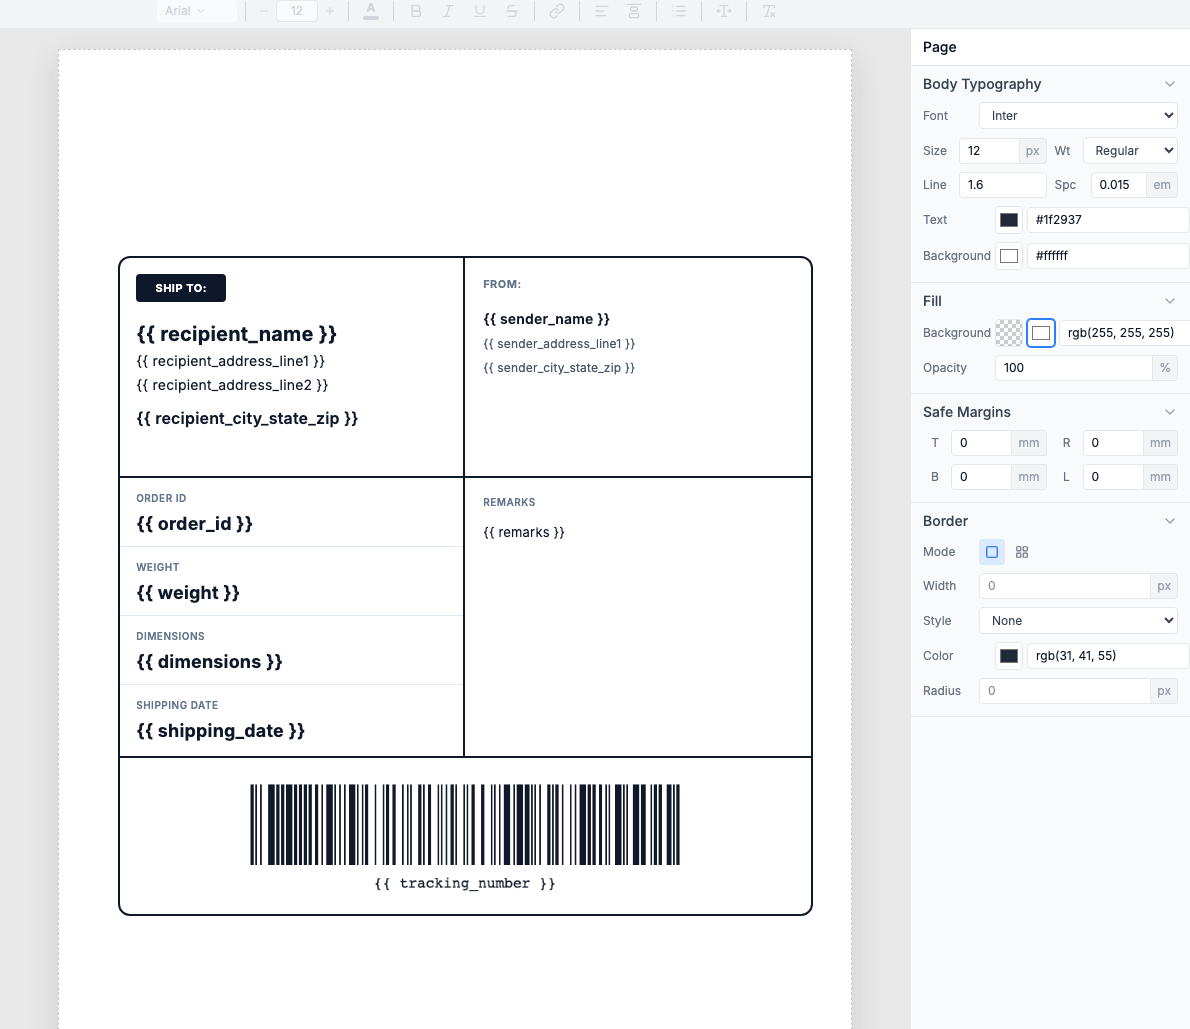
Hardcode once (your company)
sender_name— Your company namesender_address_line1— Return addresssender_city_state_zip— City, state, postal code
Edit these directly in the template — they stay the same for every label.
Dynamic from Zapier (per label)
recipient_name— Recipient namerecipient_address_line1— Street addressrecipient_address_line2— Apt, suite (optional)recipient_city_state_zip— City, state, ziporder_id— Order referencetracking_number— Tracking codeweight,dimensions— Package infoshipping_date— Ship date
Map these from your e-commerce platform in Zapier.
Handling multi-line addresses
Most e-commerce platforms send addresses as separate fields (line 1, line 2, city, state, zip). Use Zapier's Formatter to combine them into the format your template expects.
Learn more: Data binding · Expressions
1.3 — Configure the tracking barcode
The template already includes a Code 128 barcode bound to {{tracking_number}}. Here's how to customize it if needed:
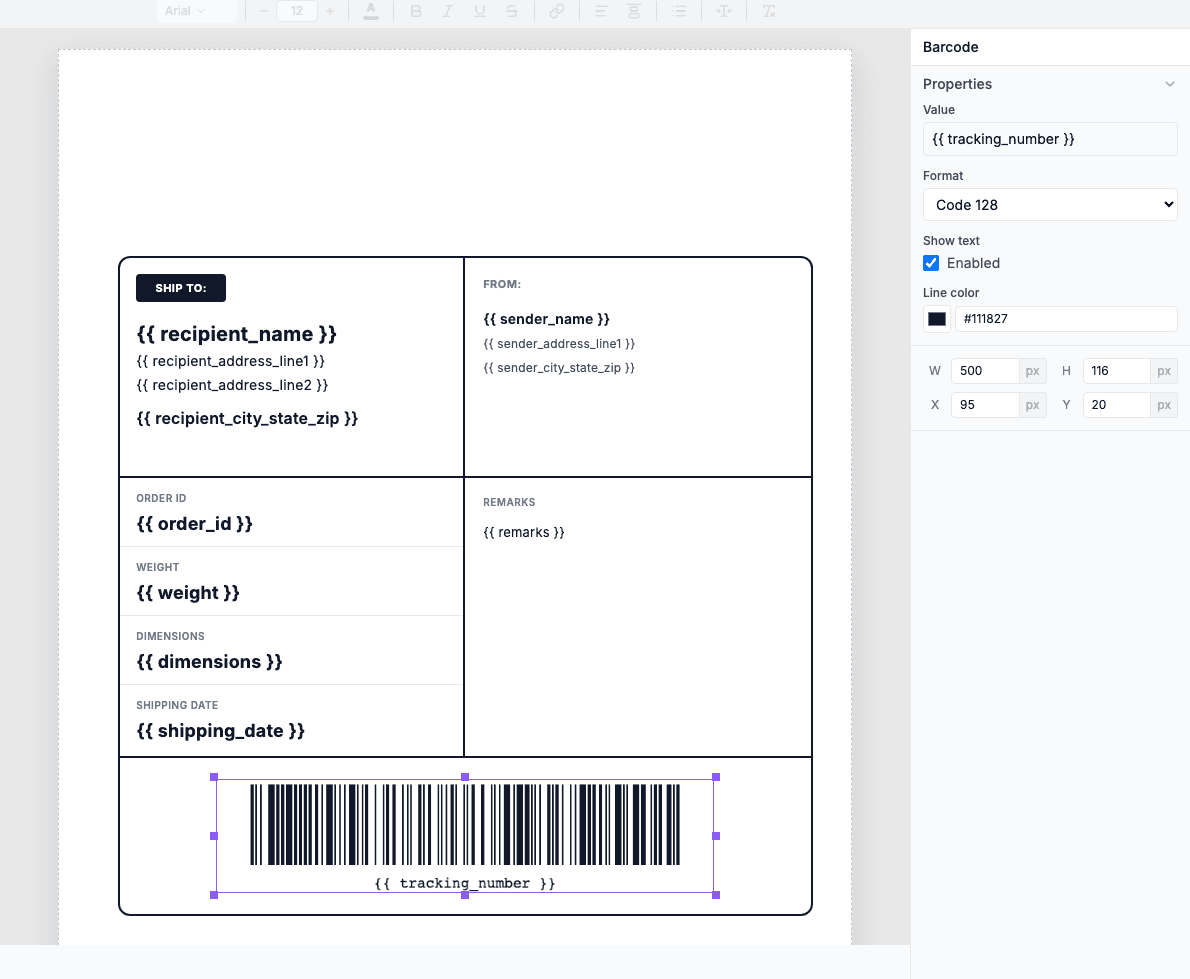
Select the barcode
Click on the barcode in the canvas. Blue handles appear when selected.
Edit in the properties panel
The right panel shows: Value (the variable), Format (Code 128), Show text, and dimensions.
Tip: The barcode uses Code 128 format, which works with most carriers (UPS, FedEx, USPS, DHL). Make sure there's enough white space around the barcode for reliable scanning.
Learn more: Barcodes & QR codes
1.4 — Test with the Preview tab
The Preview tab lets you test your template with sample data before connecting to Zapier. The JSON panel on the right contains your test data, and the rendered label appears on the left in real-time.
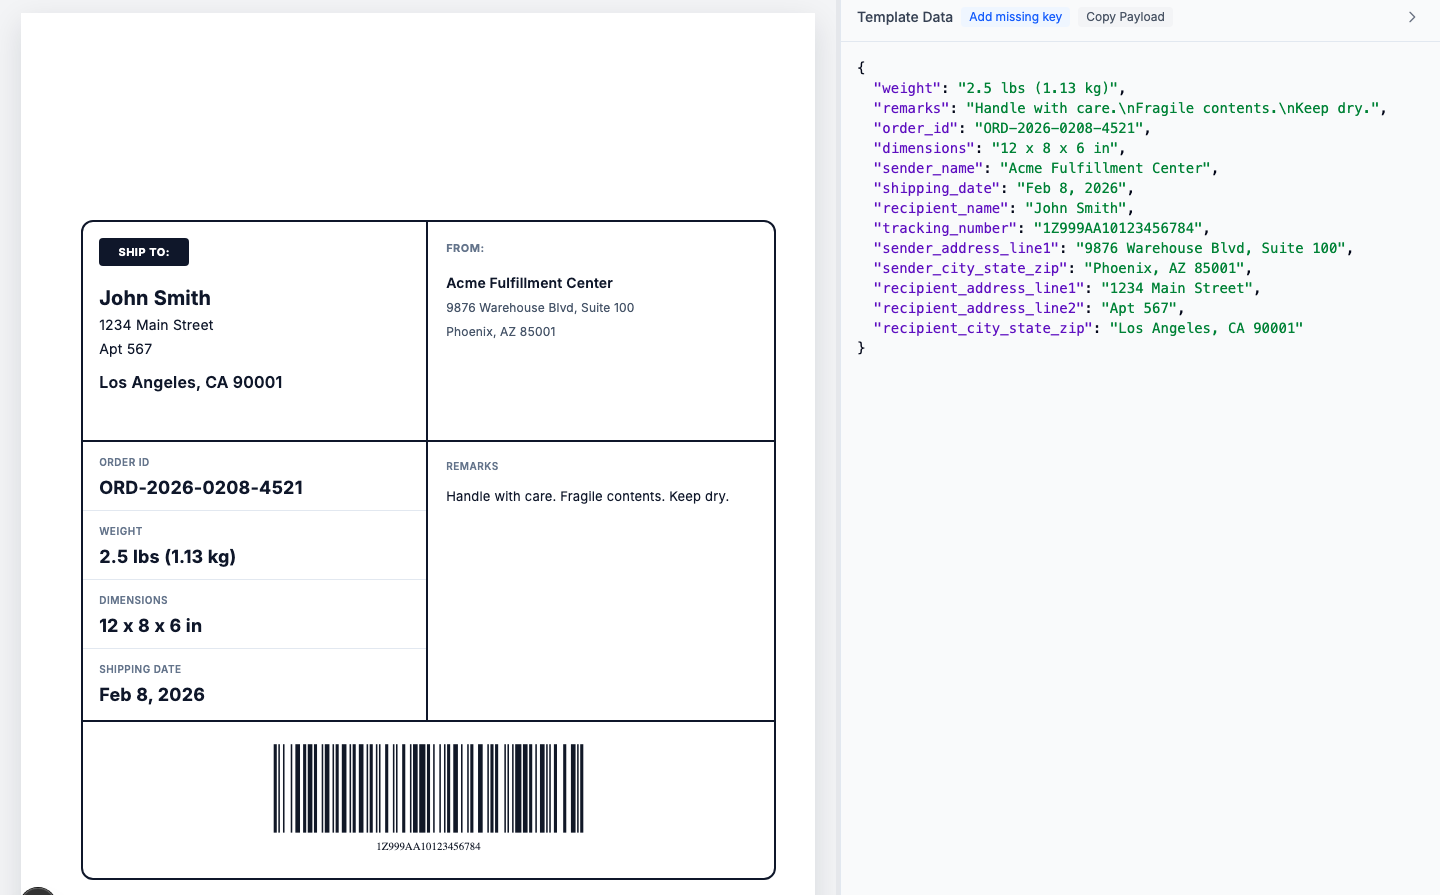
JSON data maps to template fields
Each key in the JSON (like recipient_name) fills its matching {{recipient_name}} placeholder.
Barcode renders from tracking number
The tracking_number field generates a scannable Code 128 barcode.
Verify the layout
Check that addresses are readable and the barcode has enough margin for scanning.
Tip: The field names on the right (like recipient_name) are what you'll map in Zapier. Each field becomes an input in the Zapier action.
View full JSON payload example
Connect with Zapier
Here's the complete workflow — 3 steps that run automatically on every order:
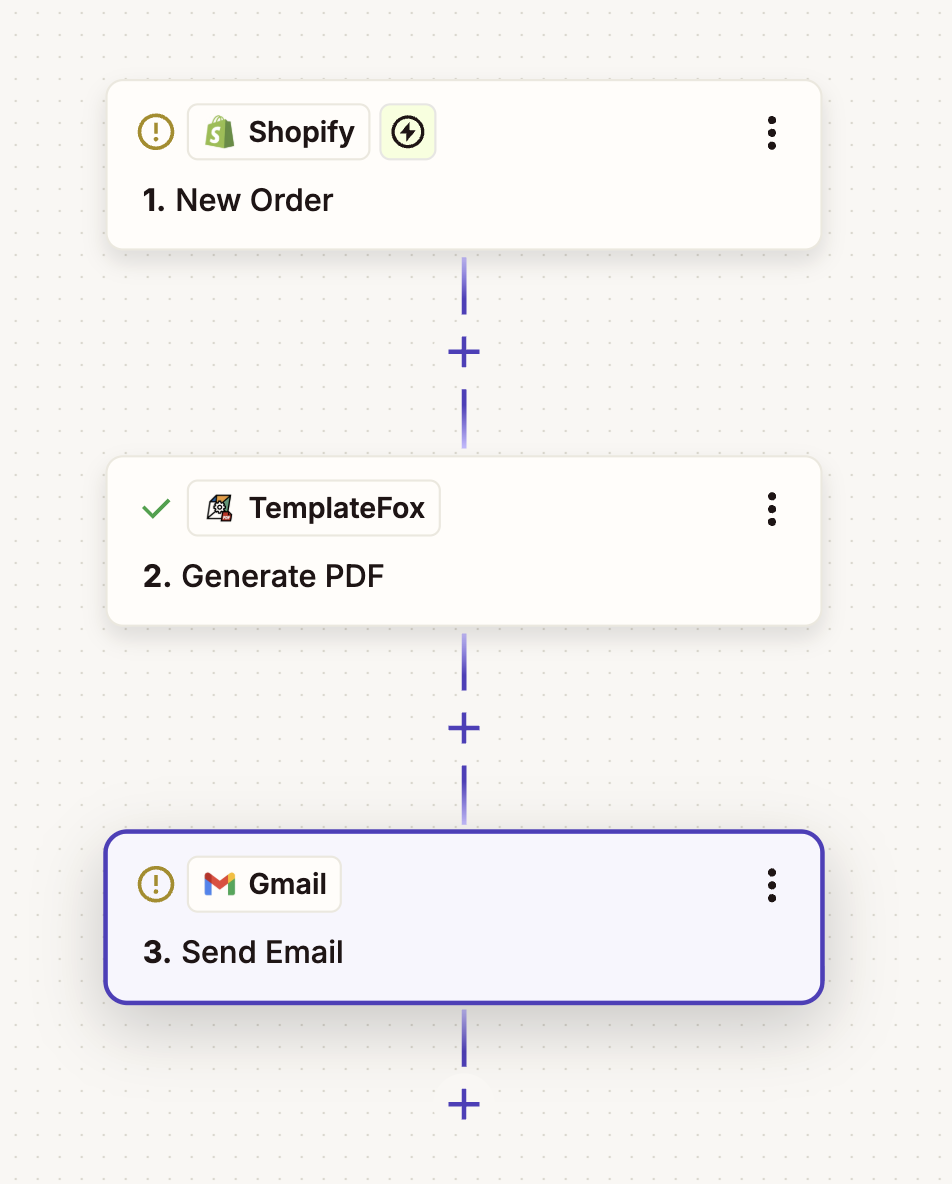
2.1 — Set up the trigger
Choose your e-commerce platform and trigger event:
Shopify
Trigger: New Order or New Paid Order
WooCommerce
Trigger: New Order
Etsy
Trigger: New Receipt (order)
BigCommerce
Trigger: New Order
- Go to zapier.com and create a new Zap
- Search for your e-commerce platform
- Select New Order (or equivalent) as the trigger
- Connect your store and test the trigger with a recent order
Shopify shipping address fields
When you test the trigger, you'll see the shipping address broken down into:
- •
Shipping Address Name→ map torecipient_name - •
Shipping Address Address1→ map torecipient_address_line1 - •
Shipping Address City + State + Zip→ combine intorecipient_city_state_zip
2.2 — Add TemplateFox action
After testing the trigger, Zapier has your order data. Now connect it to your shipping label template:
- Add an Action step
- Search for "TemplateFox"
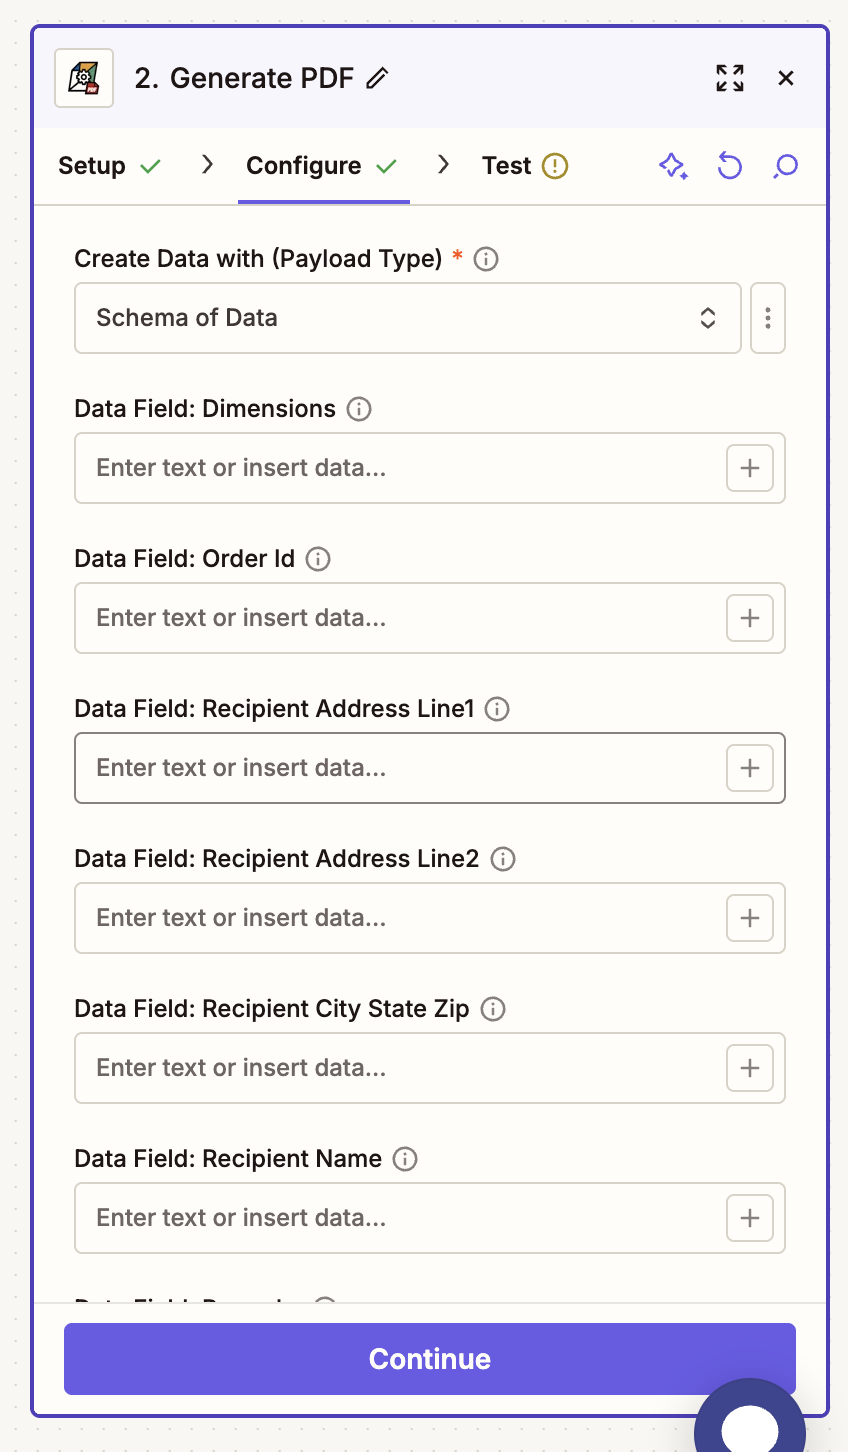
- Select "Generate PDF"
- Connect your TemplateFox account with your API key
- Select your shipping label template
- Set "Create Data with" to "Schema of Data" — this shows all template fields
- Map each field — type / to insert variables from the previous step (Shopify order data)
Tip: Hardcode your return address (sender_* fields) directly in the template — they stay the same for every label. Only map dynamic data like recipient address and order ID from your e-commerce platform.
About tracking numbers: Your e-commerce platform may not have tracking numbers at order creation time. You can either:
- • Add a step to fetch tracking from your carrier API (ShipStation, EasyPost)
- • Trigger the Zap on "Fulfillment Created" instead of "New Order"
- • Generate labels without tracking, add it manually before printing
2.3 — Send or print the label
Choose what happens with your generated shipping label:
Email to warehouse
Add Gmail/Outlook action to send the PDF to your fulfillment team. They print and attach the label to the package.
Save to Google Drive
Upload to a shared folder organized by date. Your team downloads and prints in batches.
Print automatically
Use Ezeep or PrintNode to send directly to your thermal printer (Zebra, DYMO, Brother).
Upload to S3
Use TemplateFox's built-in S3 integration to store labels in your own bucket for archival and compliance.
- Add another Action step
- Choose your delivery method (Gmail, Google Drive, Ezeep, etc.)
- Attach or upload the PDF URL from the TemplateFox action
- Turn on your Zap
Done! Every time an order is placed, a branded shipping label is automatically generated and ready for your fulfillment team.
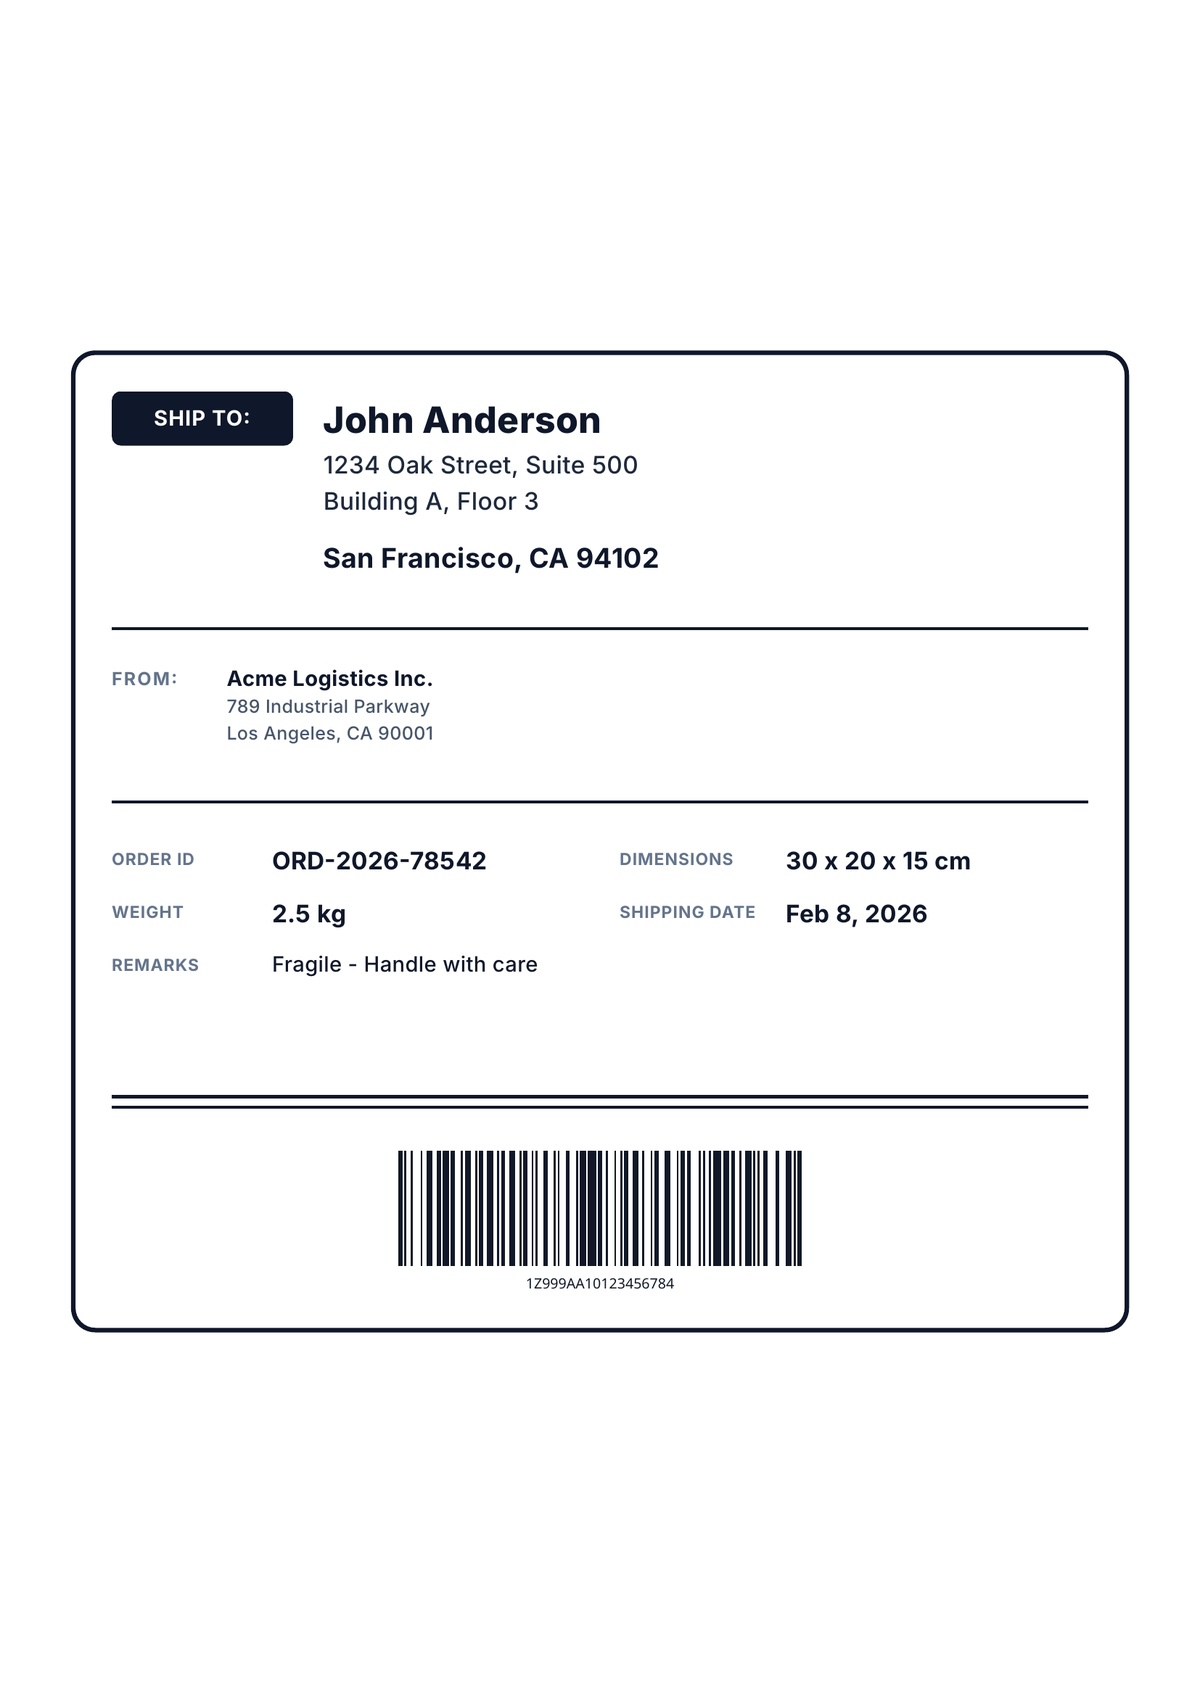
The result
Here's what your shipping label looks like — professional, branded, with a scannable barcode, generated automatically from order data:
Supported platforms
Any e-commerce platform or order management system with a Zapier integration works. Here are the most popular:
