The scenario
You just wrapped up a training session. 40 people completed the course, and each one needs a certificate of appreciation with their name on it. You have their names in Airtable already.
The old way: export the list, open your certificate template in Canva or Word, type each name by hand, export 40 PDFs, rename them, send them out. That's an afternoon gone.
The new way: install the TemplateFox extension, map the Name column to your certificate template, click Generate. Every certificate is ready in seconds, with the PDF link written back to your table.
Pick a certificate template
Start with one of our pre-built certificate templates or import your own design:
- Go to Templates
- Filter by Certificate category
- Choose a template — we'll use Certificate of Appreciation in this guide
- Click Use Template to add it to your dashboard
Using your own design? Export it from Canva or Figma as PNG, import it into TemplateFox as a background image, then add dynamic text fields on top. See Expressions for details.
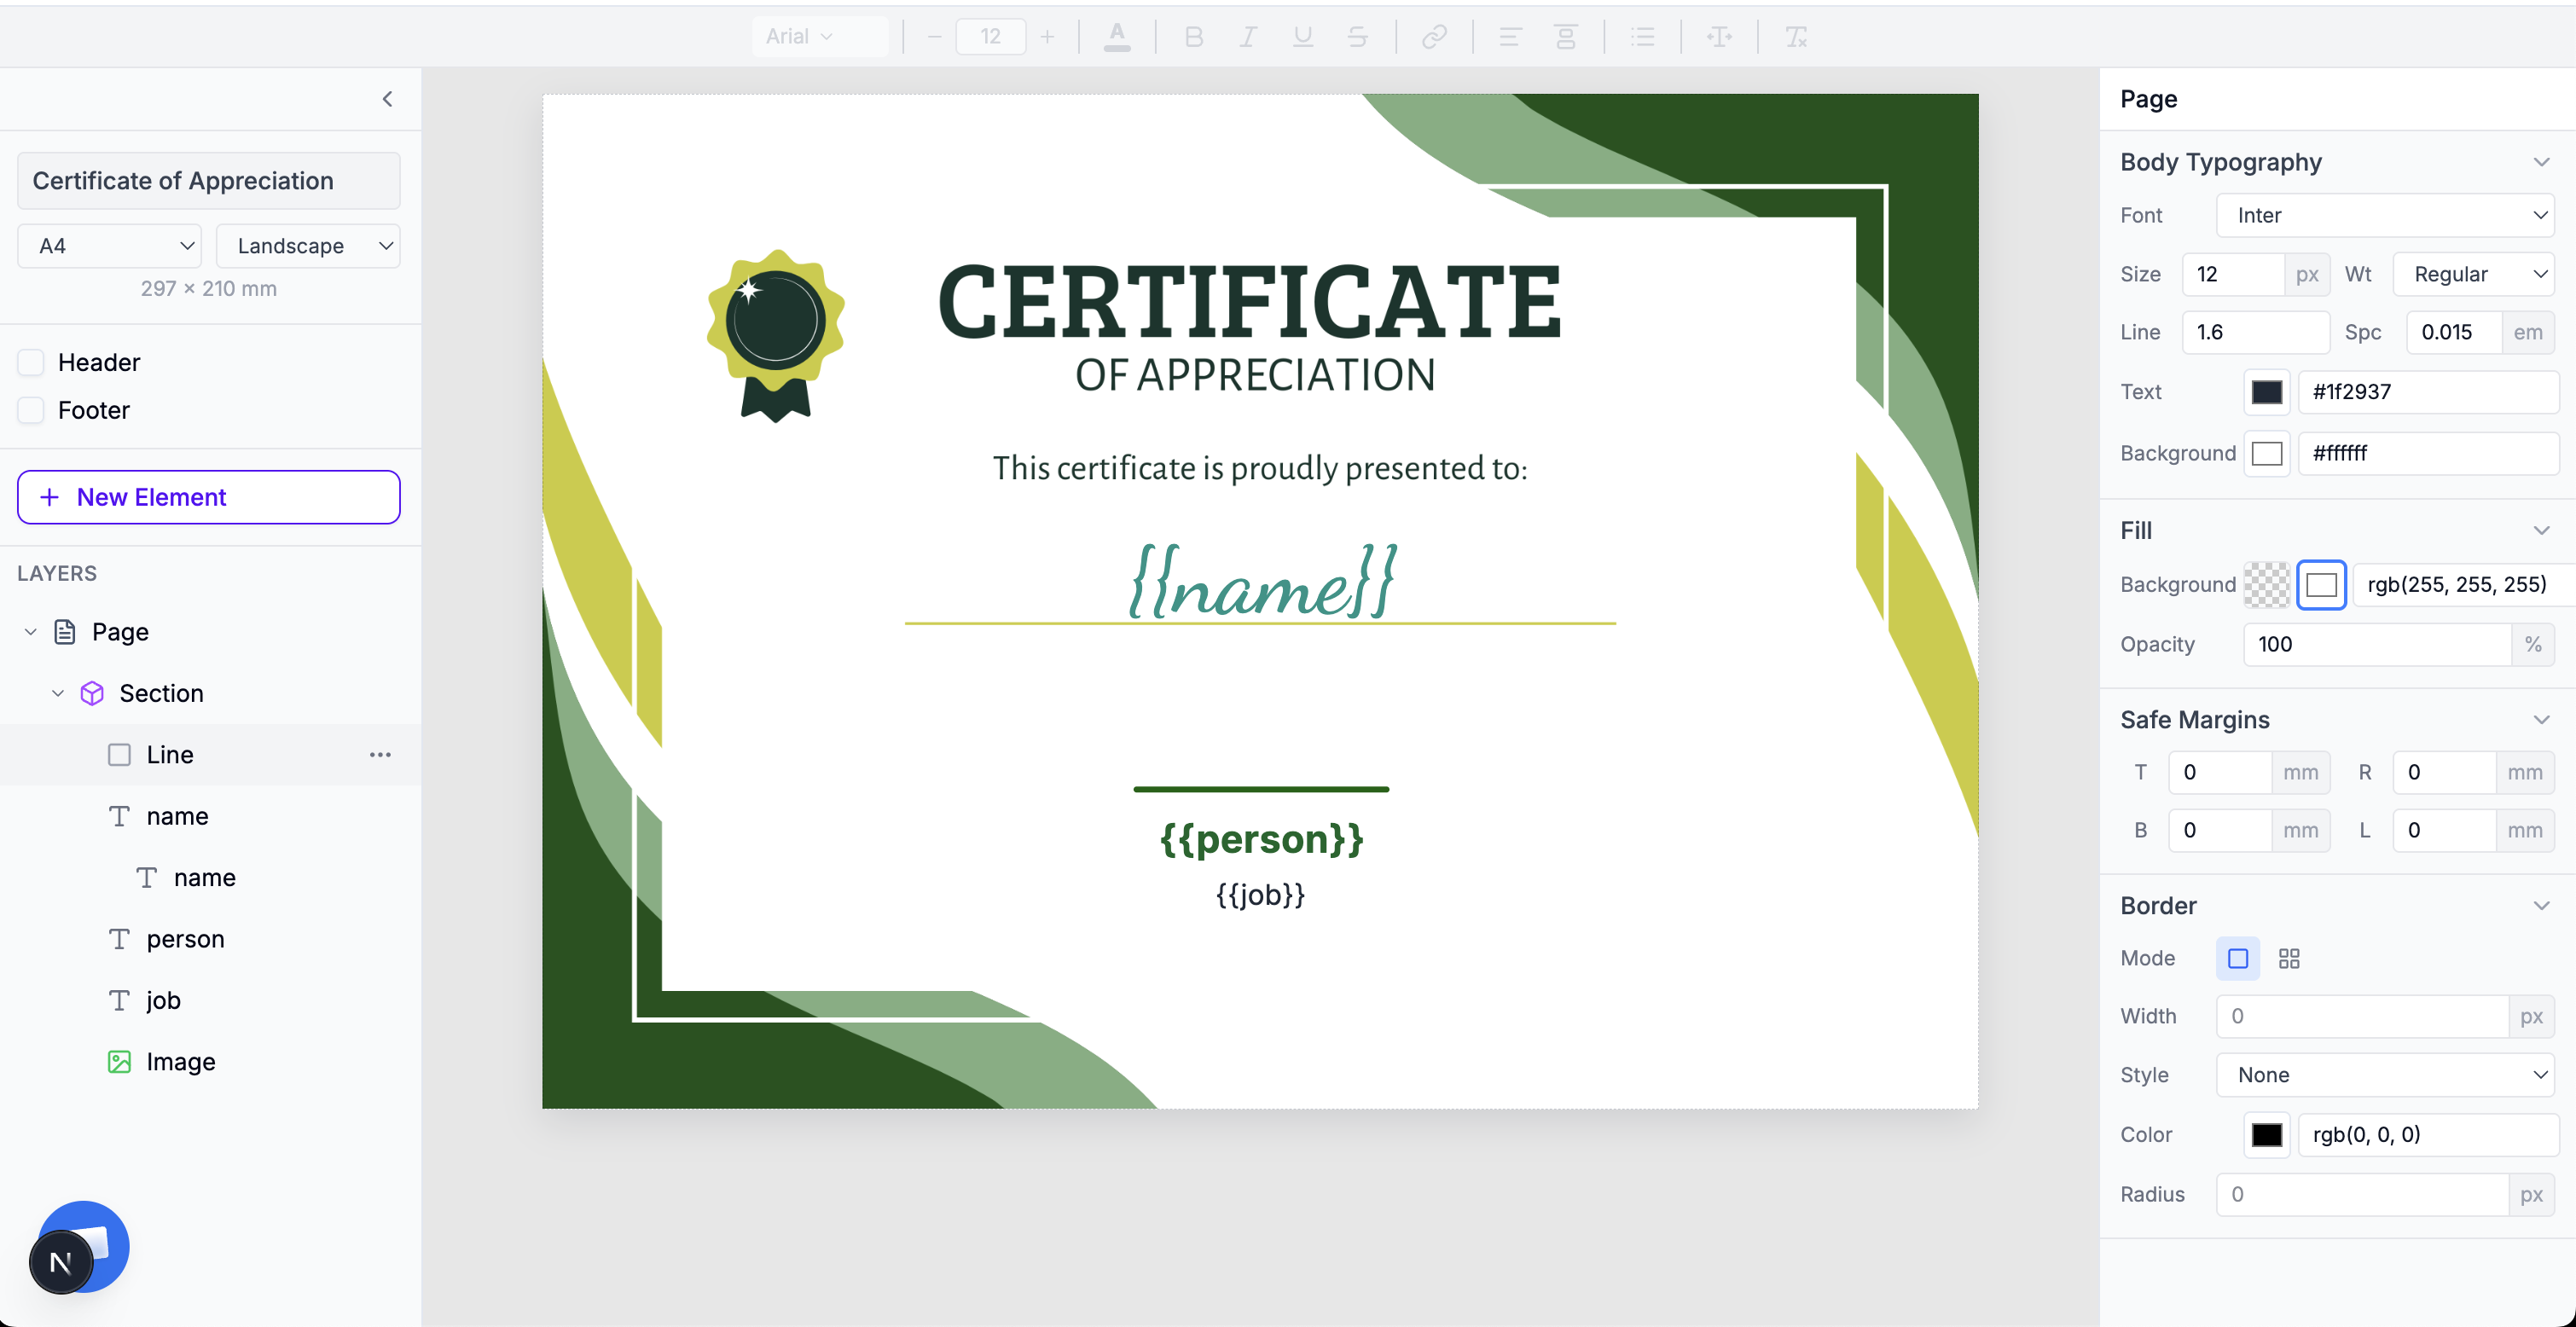
Static vs dynamic fields
A certificate typically has two kinds of information:
Static — same on every certificate
- Organization name and logo
- Signer name and title
- Certificate title ("Certificate of Appreciation")
- Decorative elements, borders
Dynamic — changes per person
name(recipient name)date(completion date)course(course title)certificate_id(unique ID)
Key insight: You don't need every field to come from Airtable. In this guide, only the Name changes per certificate. The signer name and job title are set as static values in the extension — no extra columns needed.
Set up your Airtable base
Your table needs just one thing: a column with the recipient names. That's it. If you want the PDF links saved back to your table, add a URL field too.
Minimum table structure
| Column | Type | Purpose |
|---|---|---|
| Name | Single line text | Recipient name on the certificate |
| Certificate | URL | PDF link (written automatically) |
Of course, your real table can have as many columns as you want. Extra columns like email, department, or course name can be mapped to template fields later. The point is that you don't need to restructure anything — work with what you already have.
Map fields & generate
3.1 — Install the extension
- In your Airtable base, click Extensions → Add an extension
- Search for TemplateFox
- Click Add
- Paste your API key — get one free
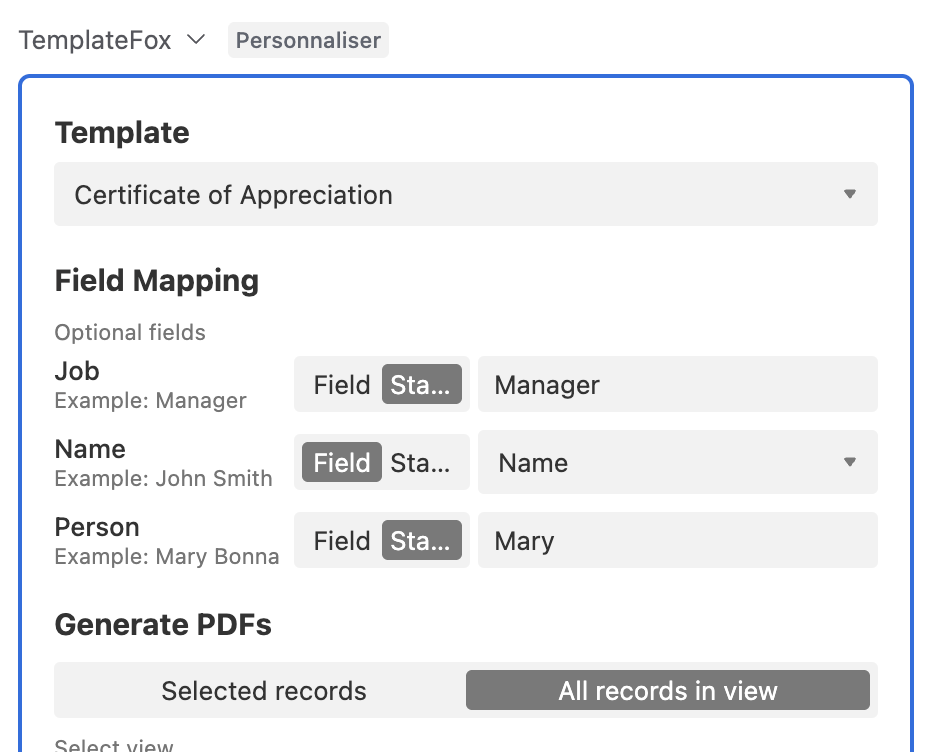
3.2 — Map your fields
Select your certificate template from the dropdown. The extension loads all template fields automatically. For each field, choose between:
- Field — pull the value from an Airtable column (changes per record)
- Static — type a fixed value (same for every certificate)
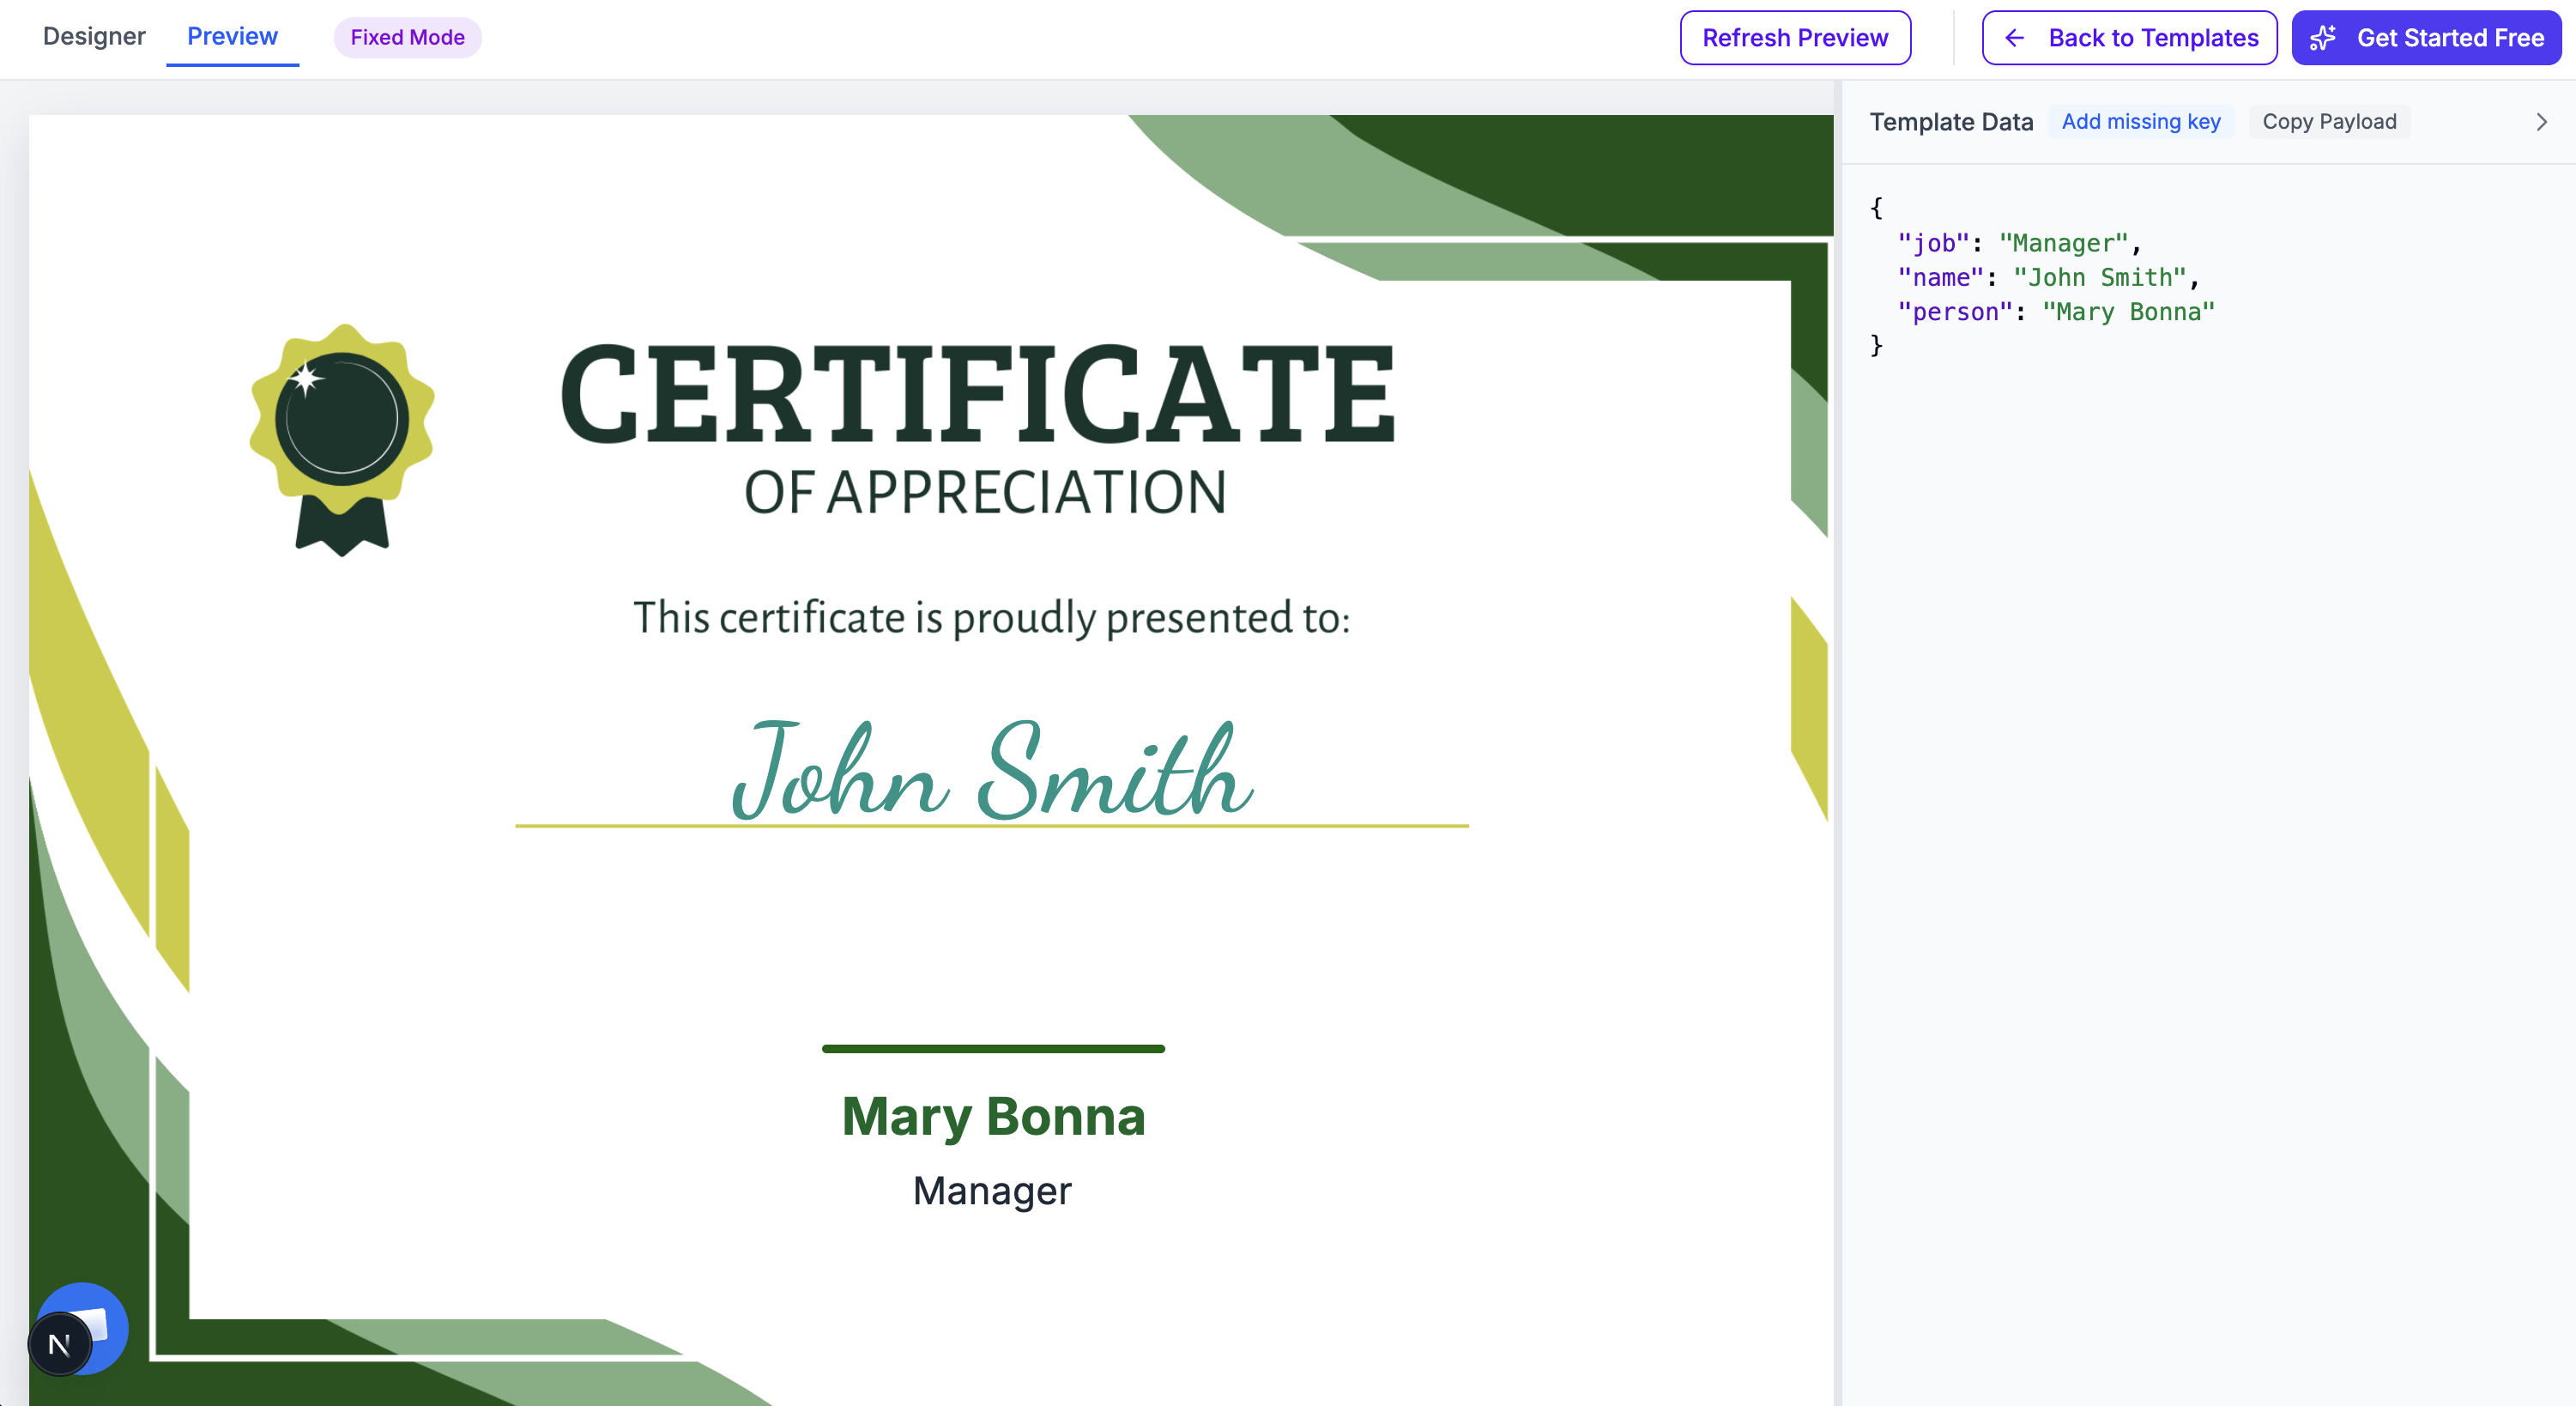
In our example, Name is mapped to the Airtable column, while Person (signer) and Job (title) are set as static values — "Mary" and "Manager". No extra columns needed for data that doesn't change.
3.3 — Generate certificates
Choose how to generate:
- Selected records — generate for specific rows you've selected
- All records in view — generate for every record in the current view
Set Write PDF URL to field to your Certificate column. After generation, each record gets its PDF link written directly to the table.
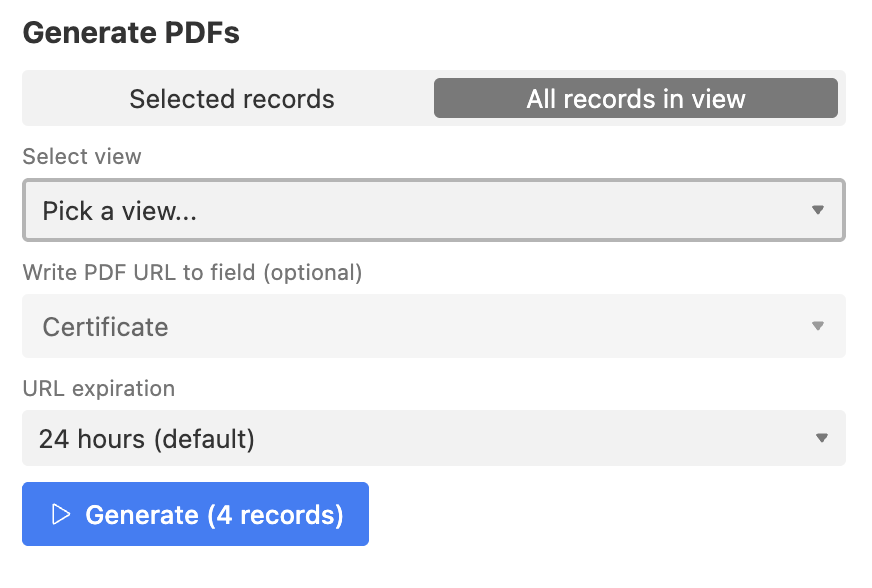
Click Generate. Each record is processed and a personalized certificate PDF appears in the Certificate column.
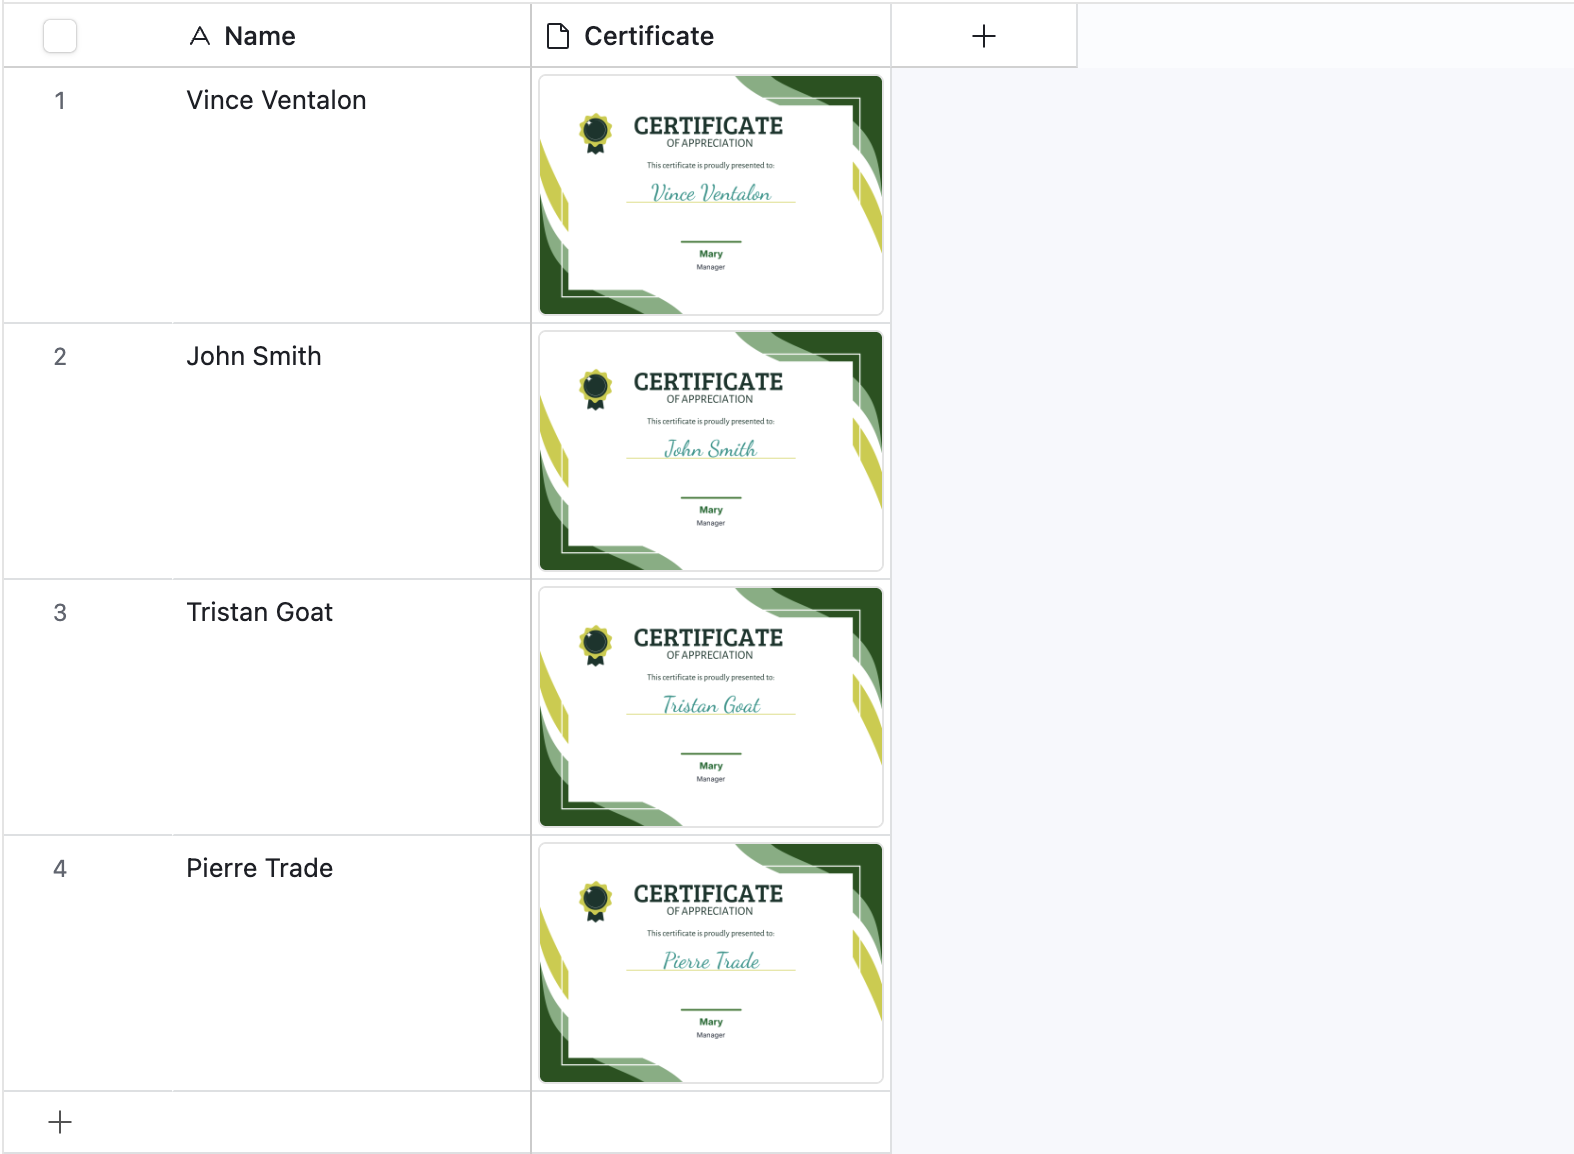
Done. Four names, four personalized certificates — each with a unique PDF link saved to the table. Scale this to hundreds of records the same way.